Posted on Leave a comment

Chicken Mole Tacos

Shredded Chicken in Mole Sauce with Corn Tortillas

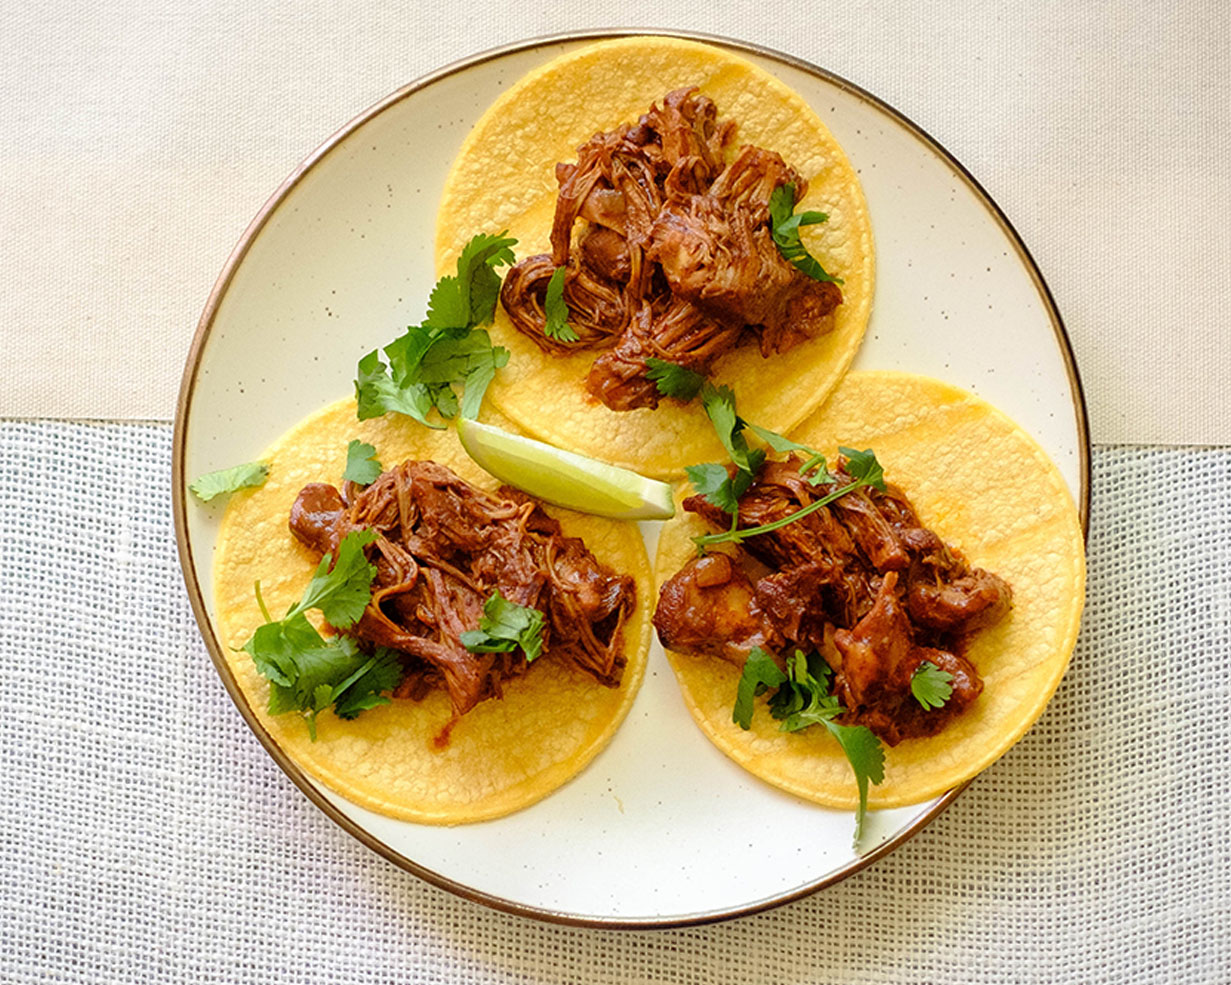
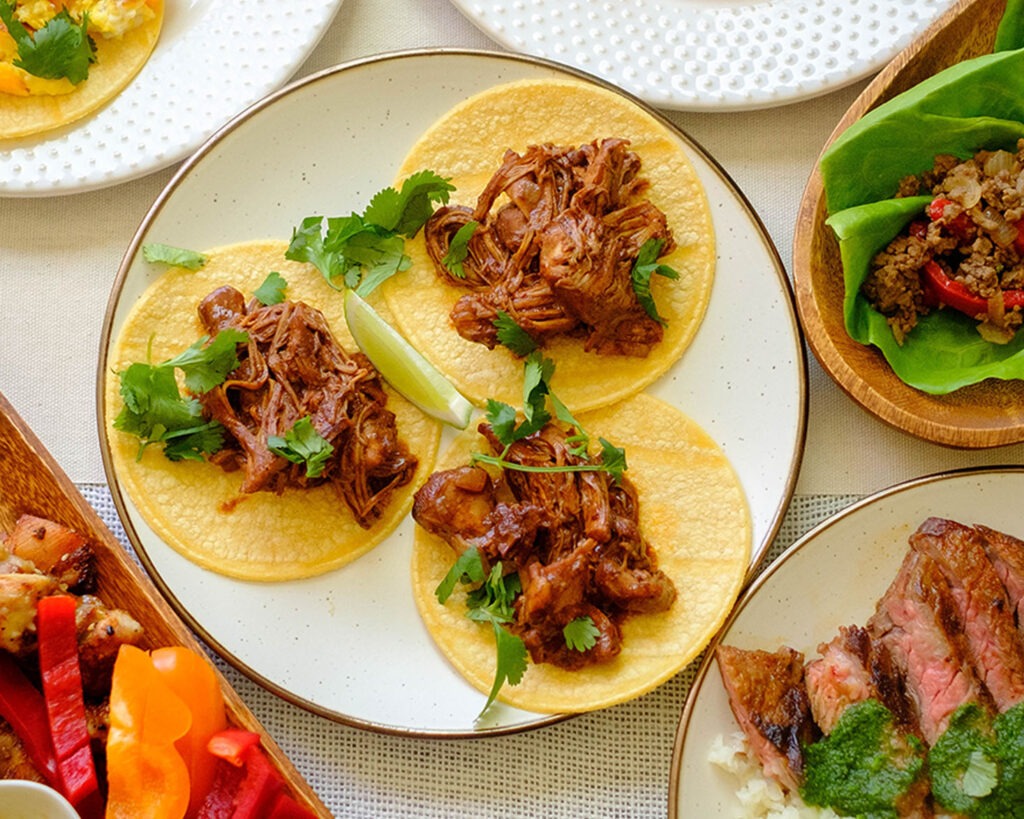
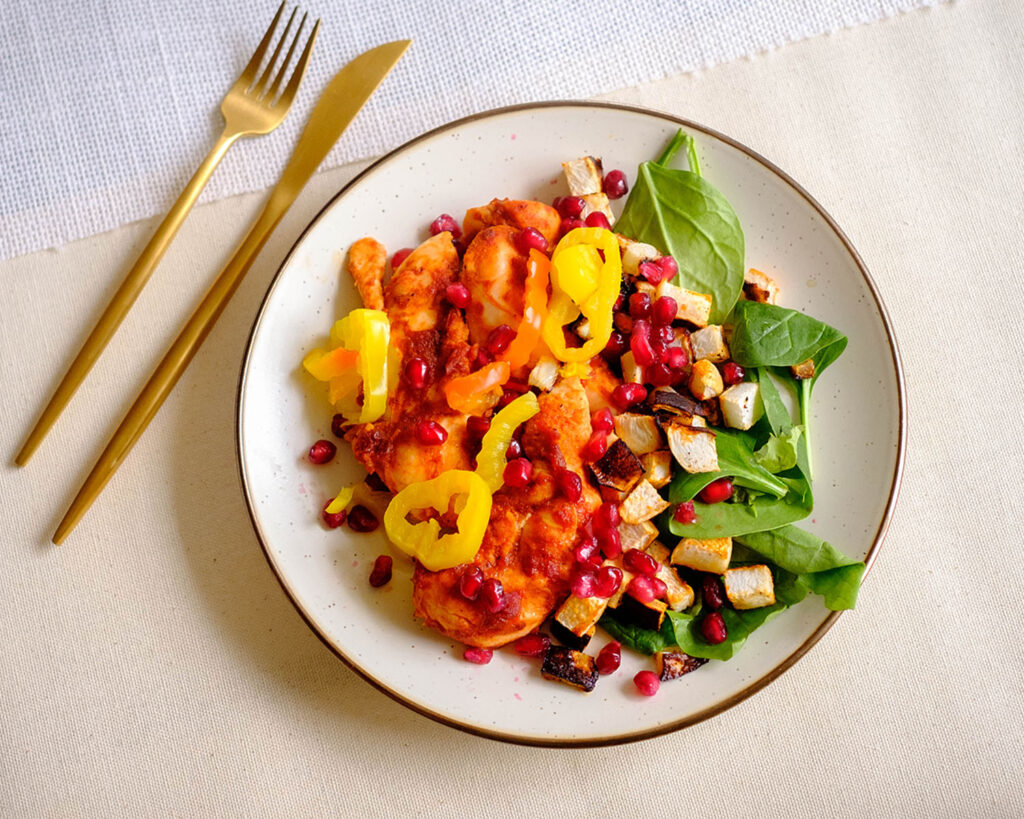
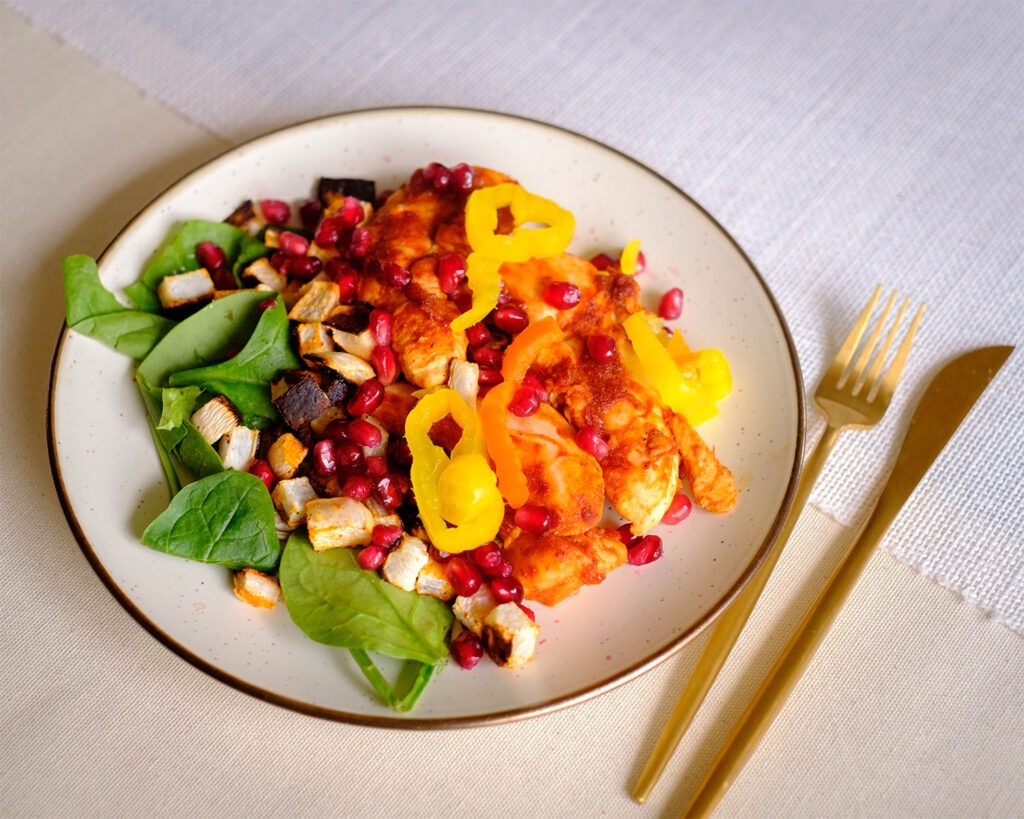
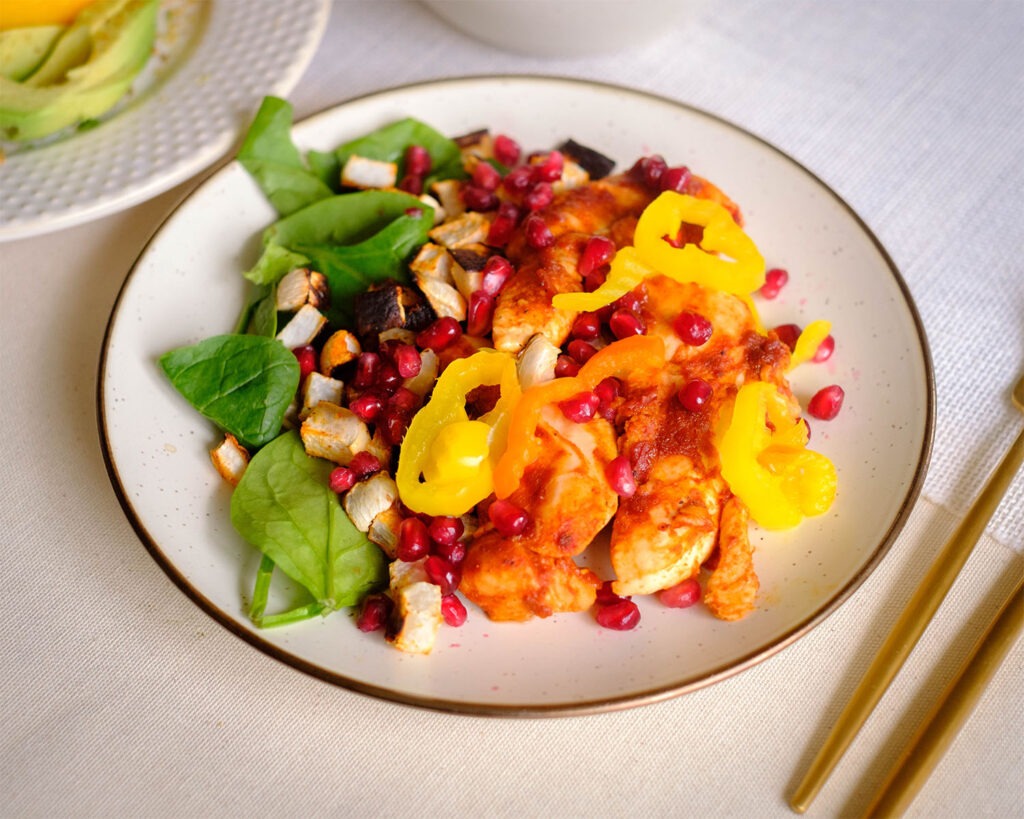
Our restaurant-quality Chicken Mole Street Tacos are ready to rock your taste buds. These babies are not only bursting with flavor but also budget-friendly and perfect for busy individuals like you who crave delicious a chicken dinner without the hassle. So go ahead, dig in, and savor every bite of these delightful tacos. Happy meal prepping!

This post may contain affiliate links. Please see our privacy policy for details.

Calories: 660kcal | Carbohydrates: 64g | Protein: 27g | Fat: 36g | Saturated Fat: 11g | Polyunsaturated Fat: 6g | Monounsaturated Fat: 14g | Trans Fat: 0.1g | Cholesterol: 116mg | Sodium: 1539mg | Potassium: 1183mg | Fiber: 12g | Sugar: 27g | Vitamin A: 5376IU | Vitamin C: 25mg | Calcium: 120mg | Iron: 4mg
Shredded Chicken in Mole Sauce with Corn Tortillas

Why You’ll Enjoy This!

  • Flavor Explosion: With the bold flavors of the mole sauce infused into every tender bite of chicken, these tacos are anything but boring. Say goodbye to bland meal prep chicken dinner and hello to a fiesta of flavors that will keep you excited for lunchtime!
  • Easy Peasy Prep: Our recipe is designed with busy individuals in mind. With simple instructions and minimal ingredients, you can whip up a batch of these tacos in no time. Perfect for those hectic weekday evenings when you need something quick and satisfying.
  • Budget-Friendly: Our Chicken Mole Street Tacos are made with affordable ingredients that won’t bust your budget. Save money without sacrificing flavor – it’s a win-win!
  • Versatile and Customizable: Don’t be afraid to get creative with your taco toppings! Whether you prefer a little extra heat with some sliced jalapeños or want to add some creamy avocado slices, these tacos are the perfect canvas for your culinary imagination.
  • Portion Control Made Easy: With each taco neatly packed and ready to go, portion control becomes a breeze. Say goodbye to the temptation of overeating – simply grab a prepped taco and enjoy a perfectly portioned meal that keeps you on track with your health goals.
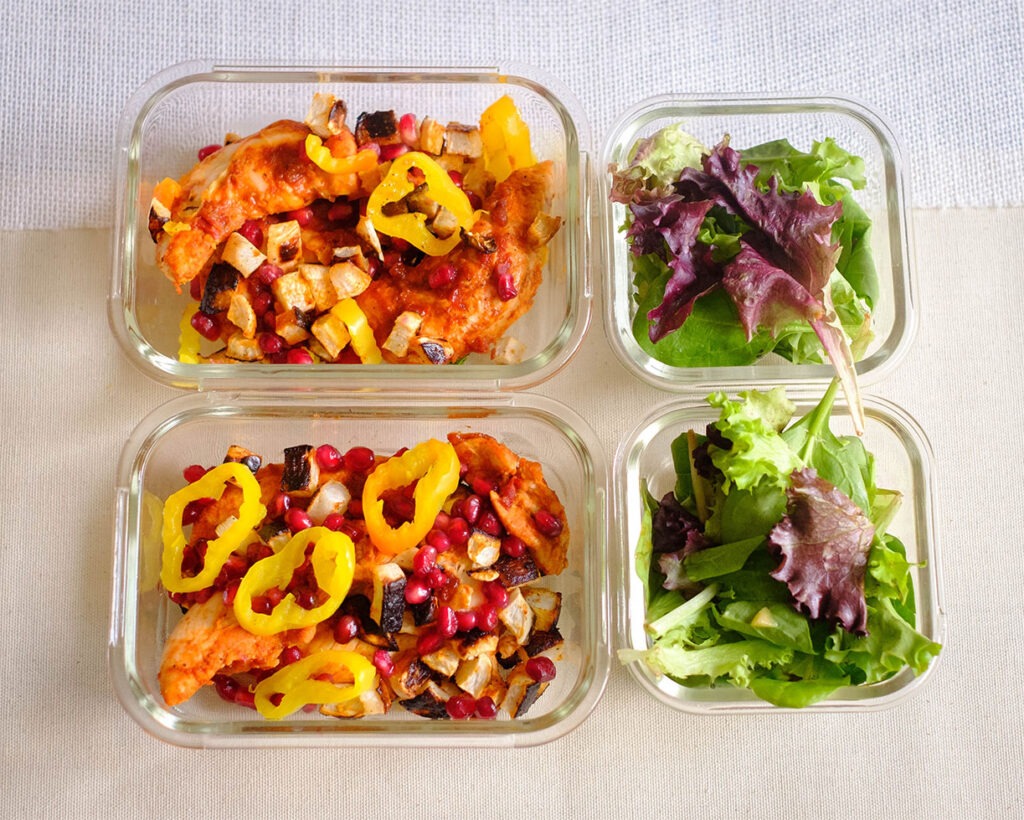
  • Meal Prep Magic: Perhaps the best reason of all – these tacos are meal prep superheroes! Whip up a batch on Sunday evening and enjoy delicious, restaurant-quality meals throughout the week. No more last-minute scrambles or unhealthy takeout – just grab and go for a stress-free week of tasty eats.

The PrepYoSelf Newsletter

Gather the Following Ingredients

  • Boneless Chicken Thighs: Chicken thighs are used for their succulent flavor and tenderness. They’re also budget-friendly compared to other cuts of meat. By using boneless thighs, we make the prep process easier and quicker while still delivering that juicy texture.
  • Corn Tortillas: Corn tortillas provide the perfect vessel for our tacos. Not only are they gluten-free and lower in calories compared to flour tortillas, but they also add a deliciously rustic flavor that complements the richness of the mole sauce.
  • White Onions: Sliced white onions add a sweet and slightly pungent flavor to the dish. They also provide a nice texture contrast to the tender chicken and creamy mole sauce. Onions are a budget-friendly ingredient that adds depth and complexity to the overall flavor profile.
  • Chicken Broth: Chicken broth serves as the base for our sauce, infusing it with savory flavor and moisture. It’s also a cost-effective way to add depth to the dish without the need for expensive ingredients.
  • Mole Base Ingredients: This combination of tomato sauce, dried ancho chile, chipotle pepper, garlic powder, cumin, and chocolate chips forms the heart and soul of our dish. Each ingredient contributes to the complex flavor profile of the mole sauce – the tomato sauce provides acidity and sweetness, the dried ancho chile and chipotle pepper add smoky heat, the garlic powder and cumin lend aromatic depth, and the chocolate chips bring richness and depth. 
  • Garnishes (Lime and Cilantro): Fresh lime slices and chopped cilantro add brightness and freshness to the tacos. The tangy citrus of the lime cuts through the richness of the mole sauce, while the herbal notes of cilantro provide a refreshing contrast to this chicken dinner. These garnishes not only enhance the flavor of the dish but also add a vibrant pop of color, making this chicken dinner as visually appealing as they are delicious.
Shredded Chicken in Mole Sauce with Corn Tortillas

How to Meal Prep Chicken Mole Tacos:

  1. In a blender, combine the tomato sauce, dried ancho chile, chipotle pepper, garlic powder, cumin, and salt. Blend until smooth and set aside. This luscious mole sauce is the secret to our tacos’ rich flavor!
  2. Heat olive oil in a soup pan over medium-high heat. Sear the chicken thighs on each side for about 3 to 4 minutes until they are golden brown and delicious. Add the sliced white onions and sauté until they soften and become fragrant.
  3. Pour in the chicken broth and the prepared Mole Base. Give it a good stir, bring it to a boil, then reduce the heat to low-medium. Cover the pan with a lid and let it simmer for approximately 25 minutes until the chicken is tender and the flavors have melded together beautifully.
  4. Once the chicken is cooked through, uncover the pan and add those decadent chocolate chips. Stir until they melt into the sauce, infusing it with a luxurious richness. Continue to simmer the sauce uncovered until it thickens to perfection.
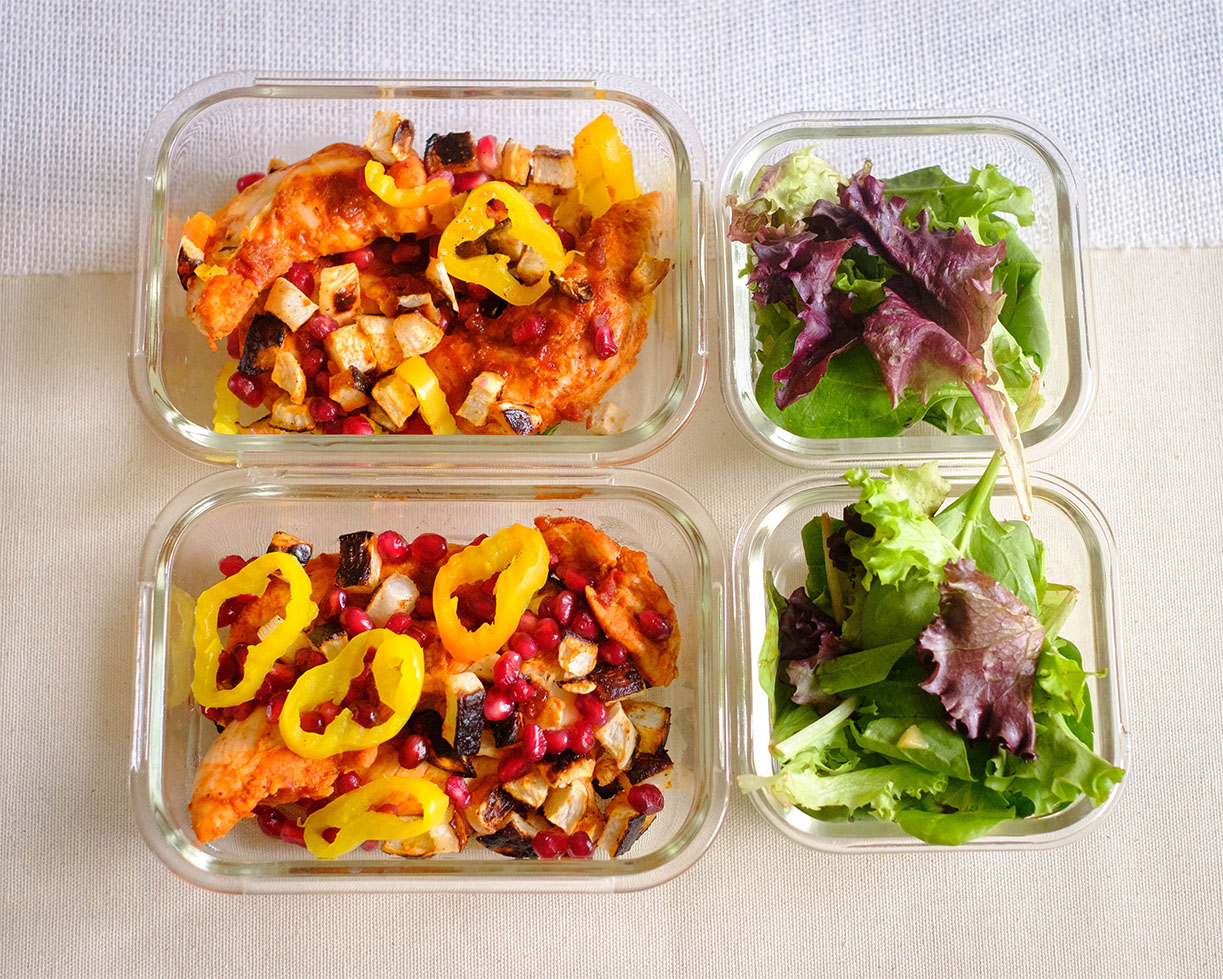
  5. Now for the fun part! Use two forks to shred the tender chicken directly in the pan. Grab your corn tortillas and fill them generously with the mouthwatering chicken filling. Top each taco with a sprinkle of fresh cilantro and a squeeze of zesty lime juice for that extra pop of flavor.

Reference the recipe card below for detailed instructions.

Shredded Chicken in Mole Sauce with Corn Tortillas

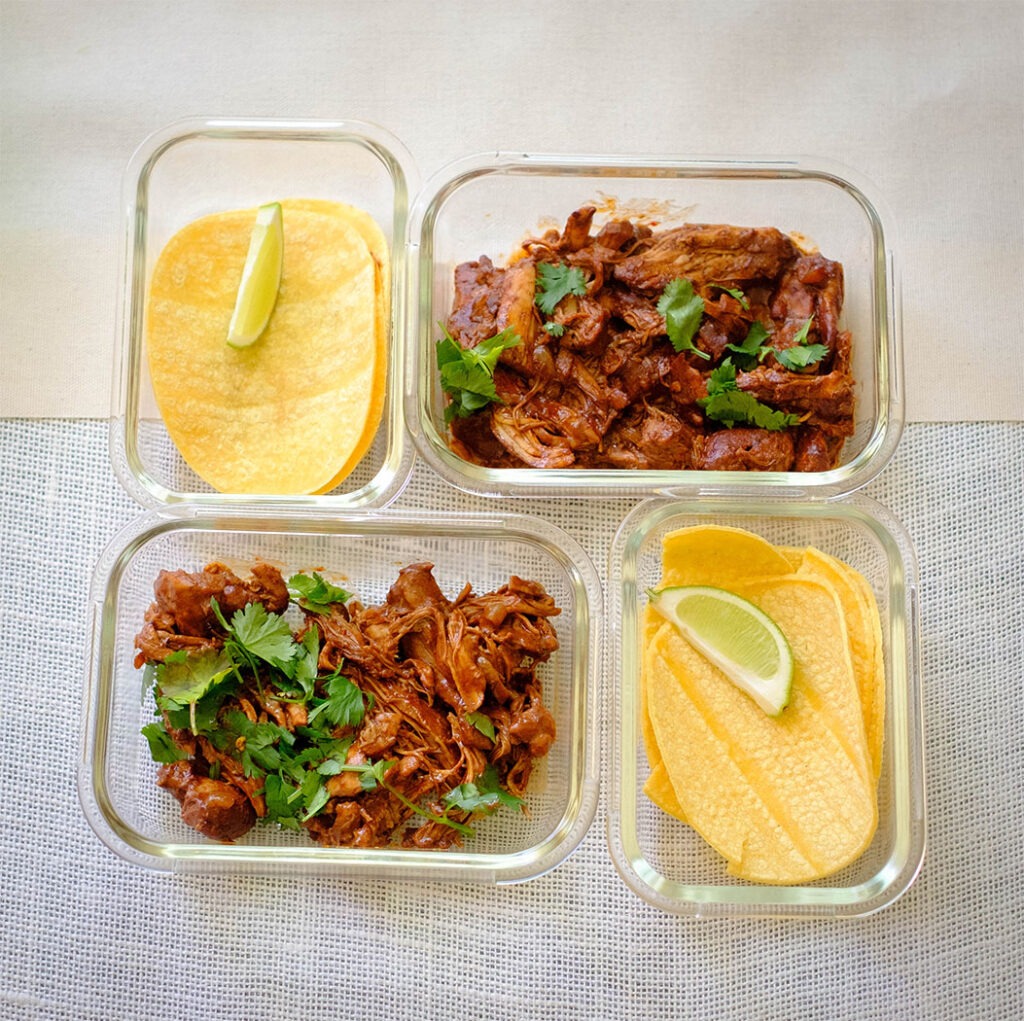
Meal Prep Tips for Chicken Mole Tacos:

  • Fresh Sides: Serve your Chicken Mole Street Tacos with fresh, vibrant sides like a crisp green salad, pico de gallo, or a refreshing fruit salsa. The bright flavors will complement the richness of the tacos and provide a balanced meal.
  • Mexican Rice: Pair your tacos with some fluffy Mexican rice for a complete and satisfying meal. The rice absorbs the flavors of the mole sauce and serves as a delicious side dish.
  • Black Beans: Add a side of seasoned black beans for extra protein and fiber. The earthy flavors of the beans complement the smoky richness of the mole sauce perfectly.
  • Corn and Avocado Salad: A light and refreshing corn and avocado salad is the perfect accompaniment to the bold flavors of the tacos. The creamy avocado and sweet corn provide a lovely contrast to the savory chicken mole filling in this chicken dinner.
  • Tortilla Chips and Guacamole: For a casual and fun meal, serve your tacos with crispy tortilla chips and homemade guacamole. The crunchy chips and creamy guac are the perfect accompaniments to the indulgent flavors of the tacos.
round plate with 3 corn tortilla tacos topped with shredded chicken and fresh cilantro

Chicken Mole Street Tacos

Deliciously tender chicken thighs simmered in a rich mole sauce, stuffed into warm corn tortillas and topped with fresh cilantro and a squeeze of lime – our Chicken Mole Street Tacos are a flavor-packed fiesta in every bite!
No ratings yet
Prep Time 5 minutes
Cook Time 35 minutes
Course lunch, Main Course
Cuisine Mexican
Servings 2
Calories 660 kcal

Equipment

  • knife
  • cutting board
  • blender
  • spatula
  • soup pot with a lid

Ingredients
  

  • 4 small corn tortillas
  • 8 oz boneless chicken thighs
  • 1/4 cup white onions (sliced)
  • 2 cups chicken broth
  • 1 tablespoon olive oil

Mole Base

  • 8 oz tomato sauce
  • 1 dried ancho chile
  • 1 chipotle pepper in adobo sauce
  • 1/4 teaspoon garlic powder
  • 1/4 teaspoon cumin
  • 1/4 teaspoon salt
  • 1/4 cup semi bittersweet chocolate chips

Garnish

  • 1 lime (sliced)
  • 1/4 cup cilantro (chopped)

Instructions
 

  • Blend together the ingredients of the mole base (minus the chocolate chips) until it is smooth and set it aside.
  • Add oil to a soup pan on medium high heat and sear the chicken thighs on each side for about 3 to 4 minutes until they are golden brown. Next add the white onions and saute until they soften.
  • Then, pour in the broth and mole base and stir it all around. Bring the soup to a boil, then lower the heat to low medium and cover the soup pan with a lid.Let it simmer for about 25 minutes until the chicken is tender.
  • After the chicken cooks, remove the lid and add the chocolate chips and stir until it fully melts. Continue to simmer the sauce until it thickens.
  • Finally use two forks to shred the chicken and stuff each tortilla with the chicken filling. Top it off with fresh cilantro and lime juice.

Notes

Nutrition information provided is an estimate. It will vary based on cooking method and specific ingredients used. Please consult with your healthcare provider for specific dietary needs. To gain a better understanding, explore our nutrition disclaimer here. 

Nutrition

Calories: 660kcalCarbohydrates: 64gProtein: 27gFat: 36gSaturated Fat: 11gPolyunsaturated Fat: 6gMonounsaturated Fat: 14gTrans Fat: 0.1gCholesterol: 116mgSodium: 1539mgPotassium: 1183mgFiber: 12gSugar: 27gVitamin A: 5376IUVitamin C: 25mgCalcium: 120mgIron: 4mg

Similar Recipes

bean and corn taco

Vegetarian Black Bean and Corn Soft Tacos

chicken salad

Oven Baked Honey Mustard Glazed Chicken Salad

balsamic chicken salad

Oven Baked Balsamic Chicken Salad with Strawberries

You Might Also Like

Frequently Asked Questions

Can I use chicken breast instead of chicken thighs?

While chicken thighs are preferred for their tenderness and flavor, you can certainly use chicken breast if you prefer. Just be mindful that chicken breast tends to be leaner and may require shorter cooking time to avoid drying out.


Is it necessary to use both dried ancho chile and chipotle pepper in adobo sauce?

The combination of dried ancho chile and chipotle pepper adds depth and complexity to the mole sauce, but if you can’t find one of the ingredients or prefer a milder heat, you can adjust the recipe accordingly. You can also substitute with other dried chiles or adjust the amount of chipotle pepper to suit your taste preferences.


Can I freeze the chicken mole filling?

Yes, you can freeze the cooked chicken mole filling for later use. Store it in a freezer-safe container for up to 2-3 months. Thaw it overnight in the refrigerator before reheating, and add a splash of chicken broth or water if needed to revive the sauce.

Posted on Leave a comment

Salmon Piccata with Asparagus

glass rectangle meal prep containers with salmon fillet topped with lemon, capers, and asparagus

Welcome to your new go-to meal prep solution that’s as delicious as it is convenient: Salmon Piccata Meal Prep! If you’re a busy individual looking to stay on track with your healthy eating goals without sacrificing flavor or breaking the bank, then you’ve come to the right place. This recipe combines tender salmon fillets, crisp asparagus, and a tangy lemon caper sauce for a gourmet experience that’s ready in a flash. With just a handful of ingredients and minimal prep time, you’ll have a week’s worth of nutritious and satisfying meals at your fingertips. Get ready to impress your taste buds and streamline your meal prep routine with this flavor-packed dish. So, let’s roll up our sleeves and dive into the kitchen – your taste buds will thank you!

This post may contain affiliate links. Please see our privacy policy for details.

Calories: 370kcal | Carbohydrates: 6g | Protein: 36g | Fat: 22g | Saturated Fat: 9g | Polyunsaturated Fat: 5g | Monounsaturated Fat: 7g | Trans Fat: 0.5g | Cholesterol: 124mg | Sodium: 680mg | Potassium: 1043mg | Fiber: 2g | Sugar: 2g | Vitamin A: 1073IU | Vitamin C: 12mg | Calcium: 56mg | Iron: 3mg

round plate with salmon fillet topped with lemon, capers, and asparagus

Why This Recipe is Great for Meal Prep

  • Quick and Easy: With just a few simple steps and minimal prep time, this recipe fits perfectly into your busy schedule. No need to spend hours in the kitchen – you’ll have delicious meals ready to go in no time!
  • Healthy and Nutritious: Salmon is packed with omega-3 fatty acids, protein, and essential vitamins, making it a nutritious choice for fueling your body. Paired with nutrient-rich asparagus, this meal provides a wholesome balance of nutrients to keep you energized throughout the day.
  • Budget-Friendly: Eating healthy doesn’t have to break the bank! This recipe utilizes affordable ingredients like salmon and asparagus, allowing you to enjoy a gourmet meal without overspending.
  • Flavor Explosion: The tangy lemon sauce infused with butter, garlic, and capers adds a burst of flavor to every bite. It’s a deliciously satisfying meal that will leave your taste buds dancing with joy.
  • Versatile: While this recipe is designed for meal prep, it’s also versatile enough to be enjoyed for dinner parties or weeknight meals. Impress your guests or treat yourself to a gourmet dinner without the hassle.

The PrepYoSelf Newsletter

To Meal Prep This Salmon Recipe You’ll Need

  • Salmon: Salmon is the star of this dish for a good reason. Not only is it rich in omega-3 fatty acids, which are beneficial for heart health and brain function, but it’s also an excellent source of protein. Protein helps to keep you feeling full and satisfied, making it an essential component of any meal. Additionally, salmon has a naturally rich and buttery flavor that pairs beautifully with the tangy lemon sauce, creating a harmonious balance of flavors.
  • Asparagus: Asparagus not only adds vibrant color to the dish but also contributes a host of nutrients. It’s packed with vitamins, minerals, and antioxidants, including vitamins A, C, E, and K. Asparagus is also high in fiber, which aids in digestion and promotes gut health. Its slightly bitter flavor complements the richness of the salmon and adds a delightful crunch to each bite.
  • Lemon Juice: Lemon juice serves as the primary acidic component in the sauce, lending a bright and tangy flavor to the dish. It adds a refreshing zing that cuts through the richness of the butter and enhances the natural flavors of the salmon and asparagus. Additionally, lemon juice is a great source of vitamin C, which boosts the immune system and aids in iron absorption.
  • Butter: Melted butter adds a luxurious richness to the sauce, creating a velvety texture that coats the salmon and asparagus. While butter is often associated with indulgence, using it in moderation adds depth of flavor without compromising on health. Opting for unsalted butter allows you to control the sodium content of the dish.
  • Capers: Capers are small, briny buds that pack a punch of flavor. They add a unique, slightly tangy taste to the sauce, balancing out the richness of the butter and adding depth to the overall flavor profile. Capers are also low in calories and high in antioxidants, making them a healthy and flavorful addition to the dish.
  • Minced Garlic: Garlic is a kitchen staple known for its pungent flavor and numerous health benefits. It adds a savory depth to the sauce, enhancing the overall complexity of flavors. Garlic is also rich in sulfur compounds that have been shown to have anti-inflammatory and immune-boosting properties, making it a nutritious addition to any meal.

round plate with salmon fillet topped with lemon, capers, and asparagus

Easy Recipe Steps to Meal Prep Oven Roasted Salmon

  1. First things first, preheat your oven to 400F. We’re getting ready to create some magic!
  2. Rinse the baby bok choy halves thoroughly to ensure they’re dirt-free. No one wants extra crunch from the soil!
  3. While the oven is heating up, let’s whip together that amazing sauce. In a small bowl, mix together the lemon juice, melted butter, capers, minced garlic, and a pinch of salt. Give it a good stir until everything is nicely combined. This sauce is going to be the star of the show!
  4. Now, grab a sheet pan and lay out your salmon fillets and asparagus. It’s like creating a canvas for a masterpiece!
  5. Next, pour that delectable sauce you just made all over the salmon and asparagus. Be generous! We want every bite to be bursting with flavor.
  6. Once your oven is nice and toasty, pop the sheet pan in and let the magic happen. Bake for 10-12 minutes, or until the salmon is cooked to perfection and the asparagus is tender. Trust me, your kitchen is going to smell amazing!
  7. Once the timer goes off, carefully remove the sheet pan from the oven. Let it cool for a moment before portioning out your servings into containers.

Reference the recipe card below for detailed instructions.

rectangle glass meal prep containers with salmon fillet topped with lemon, capers, and asparagus

Meal Prep and Pairing Tips

  • Grains: Pairing this dish with a whole grain such as quinoa, brown rice, or farro can add texture, substance, and extra nutrients to your meal. Cook a batch of grains during your meal prep session and portion them into containers alongside the salmon and asparagus.
  • Fresh Fruit: Adding fresh fruit like berries, sliced apples, or grapes to your meal prep containers provides a refreshing and sweet contrast to the savory flavors of the salmon piccata. It’s a simple and nutritious way to round out your meal.
  • Healthy Fat Sources: Consider adding sources of healthy fats such as avocado slices, nuts, or seeds to your meal prep containers. These ingredients not only add flavor and texture but also help to keep you feeling full and satisfied.
  • Herbs: Garnishing your meal prep containers with fresh herbs like parsley, dill, or basil adds a pop of color and freshness. 
  • Sauce Options: While the lemon caper sauce is delicious on its own, you can also consider pairing the salmon piccata with additional sauce options such as pesto, tzatziki, or salsa verde for variety. Portion the sauce into small containers or drizzle it directly over the meal prep containers before serving.

glass rectangle meal prep containers with salmon fillet topped with lemon, capers, and asparagus

glass meal prep containers with salmon, asparagus, topped with lemon slice and capers

Oven Baked Salmon Piccata with Roasted Asparagus

Effortlessly flavorful Salmon Piccata Meal Prep: succulent salmon and crisp asparagus bathed in a tangy lemon caper sauce, perfect for busy days!
No ratings yet
Prep Time 5 minutes
Cook Time 10 minutes
Course dinner, lunch, Main Course
Cuisine American
Servings 2
Calories 370 kcal

Equipment

  • sheet pan
  • oven

Ingredients
  

Salmon and Asparagus

  • 12 oz salmon
  • 6 oz asparagus

Sauce

  • 2 tablespoons lemon juice
  • 2 tablespoons melted butter
  • 2 tablespoons capers
  • 1 tablespoons minced garlic
  • 1/4 teaspoon salt

Instructions
 

  • Pre-heat the oven to 400F. Mix together the sauce in a small bowl.
  • Place the salmon and asparagus on a sheet pan and evenly pour the sauce over the salmon and asparagus.
  • Bake in the oven for 10-12 minutes until the salmon is fully cooked.

Notes

Nutrition information provided is an estimate. It will vary based on cooking method and specific ingredients used. Please consult with your healthcare provider for specific dietary needs. To gain a better understanding, explore our nutrition disclaimer here. 

Nutrition

Calories: 370kcalCarbohydrates: 6gProtein: 36gFat: 22gSaturated Fat: 9gPolyunsaturated Fat: 5gMonounsaturated Fat: 7gTrans Fat: 0.5gCholesterol: 124mgSodium: 680mgPotassium: 1043mgFiber: 2gSugar: 2gVitamin A: 1073IUVitamin C: 12mgCalcium: 56mgIron: 3mg

Similar Recipes

salmon beet salad

Citrus Ginger Salmon with Roasted Beets

salmon and watermelon salad

Grilled Salmon with Watermelon Salad

salmon salad

Salmon Stuffed Avocado Salad

You Might Also Like

Frequently Asked Questions

Can I use frozen salmon instead of fresh?

Yes, frozen salmon can be used in this recipe. Just make sure to thaw it completely before cooking. You may need to adjust the cooking time slightly depending on the thickness of the fillets


Can I substitute a different type of fish for the salmon?

While salmon works beautifully in this recipe, you can certainly experiment with other types of fish such as trout, cod, or tilapia. Just be mindful of variations in cooking times and adjust accordingly.


I’m not a fan of asparagus. Can I use a different vegetable?

Absolutely! Feel free to swap out the asparagus for your favorite vegetable or a medley of veggies. Broccoli, green beans, or Brussels sprouts would all be delicious alternatives.

Posted on Leave a comment

Breakfast Bacon and Cheese English Muffin

english muffins, bacon slices, and sliced cheese

Kickstart your mornings with Easy Sausage Muffin Meal Prep! Our Sausage Muffin Meal Prep is a game-changer for those hectic mornings when time is of the essence, and a satisfying, wholesome breakfast is non-negotiable. This recipe is a celebration of flavor, designed for health-conscious individuals who refuse to compromise on taste. Get ready to discover a breakfast meal prep delight that’s budget-friendly, freezer-friendly, and a worthy contender against any fast-food breakfast option.

This post may contain affiliate links. Please see our privacy policy for details.

Calories: 340kcal | Carbohydrates: 27g | Protein: 14g | Fat: 19g | Saturated Fat: 8g | Polyunsaturated Fat: 2g | Monounsaturated Fat: 6g | Trans Fat: 0.03g | Cholesterol: 43mg | Sodium: 593mg | Potassium: 140mg | Fiber: 2g | Sugar: 0.1g | Vitamin A: 289IU | Vitamin C: 0.1mg | Calcium: 229mg | Iron: 1mg

round plate with english muffins, bacon slices, and sliced cheese for a breakfast meal prep

Why this is great for breakfast meal prep:

  • Quick and Easy Preparation: With just a few simple steps and minimal ingredients, this recipe can be whipped up in no time. Busy mornings? No problem! You can have a delicious breakfast ready to go in a matter of minutes.
  • Convenient for Meal Prep: These Breakfast Bacon and Cheese English Muffins are ideal for meal prep. You can make a batch ahead of time, store them in the fridge or freezer, and simply grab one on your way out the door. It’s a hassle-free way to ensure you have a satisfying breakfast ready to enjoy, even on your busiest days.
  • Budget-Friendly: Let’s face it, eating out for breakfast every morning can add up quickly. But with this recipe, you can enjoy a delicious and satisfying breakfast without breaking the bank. Plus, you can customize it with your favorite ingredients, making it both affordable and enjoyable.
  • Versatile and Customizable: While this recipe is delicious as is, it’s also incredibly versatile. Feel free to mix things up by adding your favorite toppings or swapping out ingredients to suit your taste preferences. Whether you prefer turkey bacon, avocado, or a sprinkle of herbs, the possibilities are endless!

round plate with english muffins, bacon slices, and sliced cheese for a breakfast meal prep

Simple Ingredients:

  • English Muffins: English muffins are the hearty, yet light base for our breakfast creation. They’re convenient, budget-friendly, and provide a satisfying texture that holds up well against the other ingredients. Compared to traditional bread slices, English muffins are lower in calories and carbohydrates, making them a healthier option for those watching their intake.
  • Bacon: Bacon adds that irresistible smoky, savory flavor that we all love. It brings a satisfying crunch and richness to the dish that perfectly complements the other ingredients. While bacon often gets a bad rap, it can be enjoyed in moderation as part of a balanced diet. Opting for leaner cuts and baking it in the oven helps reduce excess grease and calories, making it a healthier choice.
  • Cheese: Cheese adds creamy, gooey goodness to our English muffins, taking them to the next level of deliciousness. It provides a rich, indulgent flavor that pairs perfectly with the smokiness of the bacon. Opting for sliced cheese in this recipe keeps things convenient and budget-friendly. You can use your favorite variety, whether it’s cheddar, Swiss, mozzarella, or even a spicy pepper jack for an extra kick of flavor.

How to Meal Prep Bacon and Cheese English Muffins

  1. First things first, preheat your toaster oven to 350°F. We want it nice and toasty for our breakfast masterpiece!
  2. While the oven is warming up, it’s time to get our bacon crispy and delicious. Lay those bacon slices out on a sheet pan and pop them in the toaster oven. Let them bake for around 10-15 minutes, or until they’re golden brown and perfectly crispy. Ahh, can you smell that sizzle?
  3. Now, it’s time to prep our English muffins. Grab a knife and carefully slice them in half. Then, place those cheesy slices on the bottom halves of the English muffins. Pop them into the toaster oven for about 3 to 5 minutes, or until the cheese is ooey-gooey and irresistibly melty.
  4. Once the cheese is nice and melted, it’s time to add the star of the show – our crispy bacon slices! Layer those savory strips on top of the cheesy English muffins.
  5. Go ahead and add any extra toppings you love. Maybe a sprinkle of black pepper or a drizzle of hot sauce? Get creative and make it your own!

Reference the recipe card below for detailed instructions.

english muffins, bacon slices, and sliced cheese in containers for breakfast meal prep

Breakfast Meal Prep Pairing Tips:

  • Individually Wrap: If you’re meal prepping for on-the-go, consider individually wrapping each English muffin in parchment paper or aluminum foil. This makes them easy to grab and take with you, whether you’re heading to work, school, or the gym.
  • Customize Your Toppings: Get creative with your toppings to keep things interesting throughout the week. Try adding sliced tomatoes, avocado, spinach, or a fried egg for extra flavor and nutrition. You can also experiment with different types of cheese or sauces to switch things up
  • Fresh Fruit: Pair your Breakfast Bacon and Cheese English Muffin with a side of fresh fruit for a burst of sweetness and additional vitamins and minerals. Berries, sliced apples, or a fruit salad make for refreshing and nutritious accompaniments.
  • Hash Browns or Breakfast Potatoes: Serve your English muffins alongside crispy hash browns or roasted breakfast potatoes for a hearty and filling meal. The combination of fluffy English muffins and crispy potatoes creates a satisfying texture contrast that’s sure to please your taste buds.
  • Avocado Smash: Add a dollop of creamy avocado smash to your English muffin for a dose of healthy fats and a burst of fresh flavor. Simply mash ripe avocado with a squeeze of lime juice, salt, and pepper, then spread it on top of your cheesy bacon muffin for an extra layer of deliciousness.
  • Fresh Herbs: Sprinkle chopped fresh herbs like parsley, chives, or cilantro over your English muffin for a pop of color and flavor. The bright, herbaceous notes complement the richness of the bacon and cheese, adding a refreshing touch to your morning meal.
  • Sliced Tomatoes and Basil: Layer sliced tomatoes and fresh basil leaves on top of your cheesy bacon muffin for a taste of summer. The juicy tomatoes and aromatic basil add brightness and freshness to the dish, creating a vibrant and flavorful breakfast experience.

english muffins, bacon slices, and sliced cheese for breakfast meal prep

round plate with english muffins, bacon slices, and sliced cheese

Breakfast Bacon and Cheese Muffin

Deliciously satisfying Breakfast Bacon and Cheese English Muffins, perfect for busy mornings, packed with crispy bacon, gooey cheese, and toasted English muffins!
No ratings yet
Prep Time 5 minutes
Cook Time 10 minutes
Course Breakfast
Cuisine American
Servings 2
Calories 340 kcal

Equipment

  • toaster oven

Ingredients
  

  • 2 english muffins
  • 2 bacon slices
  • 2 slices cheese

Instructions
 

  • Preheat the toaster oven to 350F.
  • Place the bacon on a sheet pan and bake it in the toaster oven for 10-15 minutes until it is golden brown and crispy.
  • Meanwhile, cut the English muffin in half and place the cheese slices at the bottom slice of the English muffins and let it toast in the oven for 3 to 5 minutes until the cheese melts.
  • After it cooks, at the bacon slices in between.

Notes

Nutrition information provided is an estimate. It will vary based on cooking method and specific ingredients used. Please consult with your healthcare provider for specific dietary needs. To gain a better understanding, explore our nutrition disclaimer here. 

Nutrition

Calories: 340kcalCarbohydrates: 27gProtein: 14gFat: 19gSaturated Fat: 8gPolyunsaturated Fat: 2gMonounsaturated Fat: 6gTrans Fat: 0.03gCholesterol: 43mgSodium: 593mgPotassium: 140mgFiber: 2gSugar: 0.1gVitamin A: 289IUVitamin C: 0.1mgCalcium: 229mgIron: 1mg

Similar Recipes

fried egg and sausage hash

Fried Egg with Apple and Sausage Hash

Easy Cheese Omelette

easy sausage egg muffins

Sausage Egg Muffins with Strawberries

You Might Also Like

Frequently Asked Questions

Can I use different types of cheese?

Absolutely! Feel free to use your favorite type of cheese or whatever you have on hand. Whether it’s cheddar, Swiss, mozzarella, or even a spicy pepper jack, the choice is yours. Experiment with different cheeses to find your perfect flavor combination.


Can I add vegetables to this recipe?

Absolutely! Adding vegetables is a great way to add extra flavor, texture, and nutrition to your English muffins. Try adding sautéed spinach, sliced bell peppers, caramelized onions, or roasted tomatoes for a delicious twist. Just make sure to cook the vegetables before adding them to the English muffins to ensure they’re tender and flavorful.


Can I freeze these English muffins?

Yes, you can freeze these English muffins for longer-term storage. Once assembled, wrap each English muffin individually in plastic wrap or aluminum foil, then place them in a freezer-safe bag or container. They can be stored in the freezer for up to a month. When ready to eat, simply thaw them in the refrigerator overnight and reheat them in the microwave or toaster oven until warmed through.

Posted on Leave a comment

Peanut Butter and Banana Muffin Bars

rectangle baking dish with peanut butter muffin with banana slice topping

Wake up to the delightful aroma of freshly baked Peanut Butter Banana Muffin Bars, a nutritious and convenient breakfast option that will kickstart your day with a burst of flavor. This recipe combines the timeless duo of peanut butter and bananas into moist and tender muffin bars, sweetened with a touch of honey for the perfect balance of sweetness. With just a handful of pantry staples and simple instructions, you can easily whip up a batch of these delicious bars in no time, making them ideal for busy mornings or meal prepping ahead of time. Whether enjoyed warm out of the oven or packed for an on-the-go breakfast, these muffin bars are sure to become a favorite in your household. Customize them with your favorite mix-ins or enjoy them as is for a satisfying and wholesome start to your day.

This post may contain affiliate links. Please see our privacy policy for details.

Calories: 310kcal | Carbohydrates: 39g | Protein: 12g | Fat: 13g | Saturated Fat: 3g | Polyunsaturated Fat: 3g | Monounsaturated Fat: 5g | Trans Fat: 0.01g | Cholesterol: 89mg | Sodium: 177mg | Potassium: 251mg | Fiber: 2g | Sugar: 13g | Vitamin A: 218IU | Vitamin C: 0.1mg | Calcium: 130mg | Iron: 2mg

viewed from an angle a rectangle baking dish with peanut butter muffin bars with banana slice topping

Why are these muffin bars great for meal prep?

  • Convenience Factor: With just a handful of ingredients and simple instructions, these muffin bars are incredibly easy to whip up. Plus, they’re perfect for meal prepping ahead of time, saving you valuable minutes during busy mornings
  • Versatile and Customizable: While the base recipe is delicious on its own, you can easily customize these muffin bars to suit your taste preferences. Add in extras like chocolate chips, chopped nuts, or a sprinkle of cinnamon for a flavor twist.
  • Portability: Whether you’re rushing out the door or enjoying a leisurely breakfast at home, these muffin bars are the perfect grab-and-go option. Simply wrap them up individually and take them with you wherever you go.
  • Kid-Friendly: Picky eaters won’t be able to resist the sweet combination of peanut butter and bananas in these muffin bars. They’re a great way to sneak in some extra nutrients for the little ones while keeping them satisfied until lunchtime.
  • Freezer-Friendly: Make a big batch of these muffin bars and stash them in the freezer for future breakfasts. They’ll stay fresh for weeks, making them a convenient option for busy mornings or last-minute meals.

The PrepYoSelf Newsletter

Simple Ingredients for Peanut Butter and Banana Muffin Bars

  • Bananas: Bananas serve as the primary fruit component in this recipe. They not only add natural sweetness but also contribute moisture and texture to the muffin bars. Bananas are rich in potassium, which supports heart health, and fiber, which aids digestion. Additionally, bananas are typically inexpensive year-round, making them a budget-friendly choice for adding flavor and nutrients to the recipe.
  • Peanut Butter: Peanut butter not only adds a rich, nutty flavor but also brings healthy fats and protein to the table. It helps to make the muffin bars more filling and satisfying, keeping hunger at bay throughout the morning. Peanut butter is also a budget-friendly pantry staple, offering a great bang for your buck in terms of nutritional value and versatility in various recipes.
  • Egg: The egg serves as a binding agent in this recipe, helping to hold the ingredients together and providing structure to the muffin bars. Eggs are an excellent source of high-quality protein, vitamins, and minerals, including vitamin B12 and selenium. They’re also relatively affordable, especially when purchased in larger quantities, making them a budget-friendly ingredient that adds nutritional value to the recipe.
  • Milk: Milk adds moisture and richness to the muffin bars while also contributing to their tender texture. It provides essential nutrients such as calcium, vitamin D, and protein, promoting bone health and overall wellness. Milk is often an affordable staple in most households, making it a budget-friendly ingredient that enhances both the flavor and nutritional profile of the recipe.
  • Honey: Honey serves as a natural sweetener in this recipe, providing a touch of sweetness without the need for refined sugars. It also adds moisture and helps to enhance the flavors of the other ingredients. Honey contains antioxidants and has antimicrobial properties, making it a healthier alternative to processed sugars. While honey may be slightly more expensive than granulated sugar, a little goes a long way, making it a cost-effective option for adding sweetness to the muffin bars.
  • Flour: Flour serves as the base ingredient in this recipe, providing structure and volume to the muffin bars. While all-purpose flour is used here, you can also opt for whole wheat flour for added fiber and nutrients. Flour is a pantry staple that is relatively inexpensive, making it a budget-friendly option for baking a variety of recipes.
  • Baking Powder: Baking powder acts as a leavening agent in this recipe, helping the muffin bars to rise and achieve a light and fluffy texture. It ensures that the bars have the perfect amount of lift and tenderness. Baking powder is a cost-effective ingredient commonly used in baking, making it a budget-friendly addition to this recipe.

rectangle baking dish with peanut butter muffin bars with banana slice topping

How to Meal Prep Peanut Butter and Banana Muffin Bars:

  1. First things first, preheat your oven to 400°F (200°C). This ensures that it’s ready to go when your muffin bars are all set to bake.
  2. In a mixing bowl, crack open your egg and pour in the milk, honey, and peanut butter. Whisk these ingredients together until they are well combined and form a smooth mixture.
  3. Now, it’s time to add the flour and baking powder to the wet mixture. Stir everything together until you achieve a smooth batter. Make sure there are no lumps, as we want our muffin bars to be perfectly fluffy.
  4. Grease a baking dish to prevent sticking, then transfer your batter into it. Spread the batter evenly using a spatula to ensure uniform baking.
  5. lace the baking dish in the preheated oven and let your muffin bars bake for approximately 15 minutes, or until the center is fully cooked. You can test this by inserting a toothpick into the center—if it comes out clean, your bars are ready to go!
  6. Once your muffin bars are out of the oven and cooling down, it’s time to add the finishing touch. Slice some fresh bananas and place them on top of your bars for a delicious and nutritious topping.

Reference the recipe card below for detailed instructions.

rectangle baking dish with peanut butter muffin bars with banana slice topping

Meal Prep and Pairing Tips:

  • Coffee or Tea: Start your morning right by enjoying a warm cup of coffee or tea alongside your muffin bar. The slight bitterness of coffee or the soothing qualities of tea can balance the sweetness of the muffin bars, creating a harmonious breakfast duo.
  • Greek Yogurt: Serve your muffin bar with a side of creamy Greek yogurt for added protein and texture. You can even drizzle some honey on top of the yogurt for extra sweetness.
  • Granola: Sprinkle some crunchy granola over your muffin bar to add texture and a hint of sweetness. It’s a great way to add a satisfying crunch to your breakfast.
  • Maple Syrup: Drizzle a touch of maple syrup over your muffin bar for an extra layer of sweetness. The rich, caramel-like flavor of maple syrup pairs beautifully with the nuttiness of peanut butter and the natural sweetness of bananas.
  • Hard-Boiled Eggs: For a balanced breakfast with added protein, serve your muffin bar with a side of hard-boiled eggs. It’s a filling combination that will keep you satisfied until your next meal.

rectangle baking dish with peanut butter muffin bars with banana slice topping

rectangle baking dish with peanut butter muffin with banana slice topping

Peanut Butter Banana Muffin Bar

Wholesome Peanut Butter Banana Muffin Bars, bursting with natural sweetness and packed with nutrients, perfect for a quick and satisfying breakfast on-the-go!
No ratings yet
Prep Time 5 minutes
Cook Time 15 minutes
Course Breakfast
Cuisine American
Servings 2
Calories 310 kcal

Equipment

  • whisk
  • mixing bowl
  • baking dish
  • oven

Ingredients
  

  • 1 large egg
  • 1/2 cup milk
  • 1 tablespoon honey
  • 2 tablespoon peanut butter
  • 1/2 cup flour
  • 1/4 teaspoon baking powder

Instructions
 

  • Preheat the oven to 400F
  • Add the egg, milk, honey, and peanut butter to a mixing bowl.
  • Next, add the flour and baking powder and mix all the ingredients together until you get a smooth batter.
  • Transfer the batter into a greased baking dish. Bake in the oven for 15 minutes until the center is fully cooked.
  • After the muffin cooks, top it off with sliced bananas.

Notes

Nutrition information provided is an estimate. It will vary based on cooking method and specific ingredients used. Please consult with your healthcare provider for specific dietary needs. To gain a better understanding, explore our nutrition disclaimer here. 

Nutrition

Calories: 310kcalCarbohydrates: 39gProtein: 12gFat: 13gSaturated Fat: 3gPolyunsaturated Fat: 3gMonounsaturated Fat: 5gTrans Fat: 0.01gCholesterol: 89mgSodium: 177mgPotassium: 251mgFiber: 2gSugar: 13gVitamin A: 218IUVitamin C: 0.1mgCalcium: 130mgIron: 2mg

Similar Recipes

baked oatmeal

Oven Baked Oats with Apricots and Berries

ricotta apple

Oven Baked Apple with Ricotta and Walnuts

french toast 2

Oven Baked French Toast Muffins with Strawberries

You Might Also Like

Smartfruit Mellow Mango + Immunity, 100% Real Fruit Purée

Trader Joe’s Unsalted, Dry Toasted Slivered Almonds

Trader Joe’s the Dark Chocolate Lover’s Chocolate Bar

Frequently Asked Questions

How should I store the muffin bars?

Allow the muffin bars to cool completely before storing them. You can store them in an airtight container at room temperature for up to 3 days, in the refrigerator for up to 1 week, or in the freezer for up to 3 months. If storing in the freezer, individually wrap the bars in plastic wrap or aluminum foil before placing them in a freezer-safe bag or container.


Can I add other mix-ins to the batter?

Absolutely! Feel free to customize your muffin bars by adding your favorite mix-ins such as chocolate chips, chopped nuts, shredded coconut, or dried fruit. Just be mindful of the additional moisture content and adjust the baking time accordingly if needed.


Can I omit the peanut butter if I have an allergy or preference?

Yes, you can omit the peanut butter if necessary. You can replace it with almond butter, cashew butter, or sunflower seed butter if you prefer or if you have a peanut allergy.

Posted on Leave a comment

Apple Oatmeal Muffin Bars

glass meal prep containers with apple oatmeal muffin bar

Our delectable Banana Apple Baked Oatmeal breakfast muffin bars are bursting with flavor and nutrition. This budget-friendly recipe combines the sweetness of ripe bananas with the refreshing crunch of diced apples, all nestled in a hearty bed of rolled oats. Perfectly balanced with protein from eggs and a touch of olive oil for moisture, each bite is a wholesome delight that will keep you fueled throughout the day. So, grab your ingredients and get ready to enjoy a breakfast that’s as nutritious as it is delicious. Let’s bake up some goodness together!

This post may contain affiliate links. Please see our privacy policy for details.

Calories: 188kcal | Carbohydrates: 33g | Protein: 5g | Fat: 5g | Saturated Fat: 1g | Polyunsaturated Fat: 1g | Monounsaturated Fat: 2g | Trans Fat: 0.01g | Cholesterol: 82mg | Sodium: 86mg | Potassium: 376mg | Fiber: 5g | Sugar: 17g | Vitamin A: 206IU | Vitamin C: 9mg | Calcium: 55mg | Iron: 1mg

rectangular baking dish with apple oatmeal breakfast muffin bars

Here’s why this recipe rocks:

  • Nutrient-packed Ingredients: Starting your day with a balance of carbs, protein, and healthy fats is essential, and this baked oatmeal delivers just that. Bananas provide a natural sweetness along with potassium and fiber, while eggs add protein to keep you feeling full and focused.
  • Fiber-Filled Oats: Rolled oats are loaded with fiber, which helps regulate digestion, keeps your energy levels stable, and keeps those hunger pangs at bay until your next meal.
  • No-Fuss Preparation: Busy mornings call for quick and easy recipes, and this one fits the bill perfectly. With just a few simple steps, you’ll have a nutritious breakfast ready to go in no time. Blend, mix, pour, bake – it’s that simple!
  • Versatility Galore: Don’t limit yourself to just one variation of this baked oatmeal breakfast muffin bars recipe. Feel free to get creative with your toppings! Swap out the apple for berries, add a sprinkle of nuts or seeds, or drizzle on some honey for extra sweetness. The possibilities are endless!

The PrepYoSelf Newsletter

Budget-Friendly Breakfast Muffin Bars Ingredients:

  • Banana: The star of the show! Ripe bananas bring natural sweetness to the recipe without the need for added sugars. Plus, they’re loaded with potassium, fiber, and vitamins, making them a nutrient-packed addition that keeps our baked oatmeal moist and flavorful.
  • Apple: Adding diced apple not only provides a burst of fresh flavor but also brings in additional fiber, vitamins, and antioxidants. It’s a budget-friendly fruit that adds a lovely texture and sweetness to the dish, complementing the banana beautifully.
  • Rolled Oats: Ah, the humble hero of breakfast foods! Rolled oats are not only inexpensive but also incredibly nutritious. They’re high in fiber, which aids in digestion and helps keep you feeling full and satisfied. Plus, oats provide a hearty texture and nutty flavor that pairs perfectly with the fruity sweetness of the banana and apple.
  • Egg: One large egg adds protein to our baked oatmeal, helping to keep you fueled and energized throughout the morning. Eggs are also relatively inexpensive and versatile, making them a budget-friendly way to boost the nutritional content of our breakfast dish.
  • Baking Powder: A small amount of baking powder helps our baked oatmeal rise and become light and fluffy. It ensures that the texture is just right – not too dense or heavy – creating a delightful breakfast treat that’s both satisfying and budget-friendly.

rectangular baking dish with apple oatmeal breakfast muffin bars

How to Meal Prep Apple Oatmeal Breakfast Muffin Bars

  1. Preheat your oven to 400°F (200°C).
  2. In a blender or mixing bowl, mash up your ripe banana and egg until it’s smooth and creamy. No blender? No problem! A fork works just as well.
  3. Add in the rolled oats and baking powder, giving everything a good mix until it’s nicely combined.
  4. Grease up a baking dish and pour in your oatmeal batter.
  5. Time to add a little fruity flair! Dice up your apple into small pieces and scatter them on top of the batter.
  6. Pop that dish into the oven and bake for 15-20 minutes until it’s golden and cooked through.

Reference the recipe card below for detailed instructions.

glass meal prep containers with apple oatmeal breakfast muffin bars

Meal Prep Tips:

  • Yogurt: Serve your baked oatmeal with a dollop of Greek yogurt for a creamy contrast to the fruity flavors. Add a drizzle of honey or a sprinkle of cinnamon for extra indulgence.
  • Nuts and Seeds: Sprinkle chopped nuts or seeds (such as almonds, walnuts, or pumpkin seeds) on top of your baked oatmeal for added crunch and a boost of healthy fats and protein.
  • Coffee or Tea: Enjoy your Banana Apple Baked Oatmeal with a cup of your favorite hot beverage, such as coffee or tea, for a comforting and satisfying breakfast experience.
  • Spice it Up: Add a pinch of ground cinnamon, nutmeg, or vanilla extract to the batter for extra warmth and flavor.

glass meal prep containers with apple oatmeal breakfast muffin bars

rectangular baking dish with apple oatmeal muffin bar

Apple Oatmeal Muffin Bars

Wholesome and budget-friendly, our Banana Apple Baked Oatmeal combines ripe bananas, diced apples, and hearty rolled oats for a nutritious and delicious breakfast treat!
No ratings yet
Prep Time 5 minutes
Cook Time 15 minutes
Course Breakfast, Snack
Cuisine American
Servings 2
Calories 188 kcal

Equipment

  • blender
  • spatula
  • cutting board
  • oven

Ingredients
  

  • 1 large banana (ripe)
  • 1 large egg
  • 1/4 cup rolled oats
  • 1/4 teaspoon baking powder
  • 1 small apple
  • 1 teaspoon olive oil

Instructions
 

  • Preheat the oven to 400F.
  • Blend together the banana and egg until it is smooth (or you can use a fork to mash it in a mixing bowl)
  • Add the rolled oats and baking powder and mix it all together.
  • Pour the batter into a greased baking dish. Dice the apple into small pieces, and place it on top of the batter.
  • Bake it in the oven for 15 to 20 minutes until the center is fully cooked.

Notes

Nutrition information provided is an estimate. It will vary based on cooking method and specific ingredients used. Please consult with your healthcare provider for specific dietary needs. To gain a better understanding, explore our nutrition disclaimer here. 

Nutrition

Calories: 188kcalCarbohydrates: 33gProtein: 5gFat: 5gSaturated Fat: 1gPolyunsaturated Fat: 1gMonounsaturated Fat: 2gTrans Fat: 0.01gCholesterol: 82mgSodium: 86mgPotassium: 376mgFiber: 5gSugar: 17gVitamin A: 206IUVitamin C: 9mgCalcium: 55mgIron: 1mg

Similar Recipes

baked oatmeal

Oven Baked Oats with Apricots and Berries

ricotta apple

Oven Baked Apple with Ricotta and Walnuts

french toast 2

Oven Baked French Toast Muffins with Strawberries

You Might Also Like

Smartfruit Mellow Mango + Immunity, 100% Real Fruit Purée

Trader Joe’s Unsalted, Dry Toasted Slivered Almonds

Trader Joe’s the Dark Chocolate Lover’s Chocolate Bar

Frequently Asked Questions

Can I use instant oats instead of rolled oats?

While instant oats can be used in a pinch, rolled oats are preferred for their texture and heartiness in this recipe. Instant oats may result in a softer texture, but the overall flavor should remain similar.


Can I freeze the baked oatmeal muffin?

Yes, you can freeze baked oatmeal muffins for longer storage. Once cooled, wrap individual portions tightly in plastic wrap or aluminum foil, then place them in a freezer-safe bag or container. Freeze for up to 3 months. Thaw overnight in the refrigerator or reheat from frozen in the microwave or oven.


Can I omit the egg to make it vegan?

Absolutely! You can substitute the egg with a flax or chia egg (1 tablespoon ground flaxseed or chia seeds mixed with 3 tablespoons of water, let sit for 5 minutes to gel) to make this recipe vegan-friendly.

Posted on Leave a comment

Breakfast Sausage and Cheese English Muffin

glass meal prep containers with english muffin with a sausage patty, topped with shredded cheese and orange slices.

Kickstart your mornings with Easy Sausage Muffin Meal Prep! Our Sausage Muffin Meal Prep is a game-changer for those hectic mornings when time is of the essence, and a satisfying, wholesome breakfast is non-negotiable. This recipe is a celebration of flavor, designed for health-conscious individuals who refuse to compromise on taste. Get ready to discover a breakfast meal prep delight that’s budget-friendly, freezer-friendly, and a worthy contender against any fast-food breakfast option.

This post may contain affiliate links. Please see our privacy policy for details.

Calories: 350kcal | Carbohydrates: 42g | Protein: 14g | Fat: 14g | Saturated Fat: 5g | Polyunsaturated Fat: 2g | Monounsaturated Fat: 6g | Trans Fat: 0.1g | Cholesterol: 37mg | Sodium: 588mg | Potassium: 424mg | Fiber: 5g | Sugar: 12g | Vitamin A: 384IU | Vitamin C: 70mg | Calcium: 129mg | Iron: 1mg

round plate with breakfast meal prep english muffin with a sausage patty, topped with shredded cheese and orange slices.

Freezer-Friendly Bonus:

For all the savvy preppers out there, rejoice! This Sausage Muffin Meal Prep is freezer-friendly. Make a batch, freeze ’em, and have breakfast ready for those extra hectic mornings. Simply reheat and conquer – meal prep made even more convenient!

There you have it – a meal prep gem that ticks all the boxes for busy, health-conscious individuals like yourself. Delicious, wallet-friendly, and freezer-ready – what more could you ask for?

Give it a try, and let the flavors speak for themselves. Your mornings just got a whole lot brighter and tastier!

The PrepYoSelf Newsletter

Ingredients You’ll Need

  • English Muffins: These delightful round wonders are the foundation of our meal prep. Not only are they incredibly versatile, but they also bring a satisfying texture and flavor to the dish. Plus, English muffins are the perfect canvas for the rest of our ingredients. They’re light, fluffy, and just the right amount of chewy – the ideal base for building a breakfast meal prep masterpiece!
  • Chicken Breakfast Sausage Patties: Why chicken sausage? Because it’s a lean, protein-packed powerhouse! Chicken sausage brings all the savory goodness without the excess fat found in some traditional pork options. It’s a healthier choice that doesn’t compromise on flavor. Plus, the pre-packaged convenience makes our breakfast meal prep a breeze for those busy mornings when you need a quick and nutritious fix.
  • Shredded Cheese: Ah, the cheesy goodness! Shredded cheese adds a creamy and indulgent element to our Sausage Muffin. It’s not just about the flavor – cheese also provides a satisfying richness that elevates the entire experience. And guess what? You only need a sprinkle, making it a budget-friendly choice without sacrificing the joy of melted, gooey perfection.
  • Oranges: Let’s bring in a burst of freshness! Sliced oranges are like nature’s candy – sweet, tangy, and a refreshing contrast to the savory notes of the sausage and cheese. Not only do they add a pop of color to your plate, but they also contribute a dose of vitamin C, boosting your immune system. Healthy, flavorful, and a delightful pairing with the savory goodness of the main dish.

Now, the magic happens when these ingredients come together. The English muffins provide a hearty base, the chicken sausage adds savory protein, the cheese introduces a comforting richness, and the oranges bring a zesty freshness. It’s a harmonious blend of textures and flavors that mimics the satisfaction of fast food breakfast options without the guilt.

round plate with breakfast meal prep of english muffin with a sausage patty, topped with shredded cheese and orange slices.

How to Meal Prep Sausage and Cheese English Muffins

  1. Fire up that toaster oven to a toasty 350°F. We’re about to transform simple ingredients into breakfast magic!
  2. Follow the packaged instructions to heat up those succulent chicken breakfast sausage patties.
  3. Now, here comes the fun part! Layer those golden English muffins with the hot, flavorful sausage patty, and sprinkle on the gooey goodness of shredded cheese. Building flavor, one layer at a time!
  4. Place your masterpiece on a sheet pan and let it mingle in the oven for 2 to 3 minutes. Watch the cheese melt into perfection, and the muffin toast to a glorious golden brown.
  5. Don’t forget to add a burst of freshness to your plate! Slice up two vibrant oranges for a zesty and refreshing sidekick.

Reference the recipe card below for detailed instructions.

glass breakfast meal prep containers with english muffin with a sausage patty, topped with shredded cheese and orange slices.

Breakfast Meal Prep Pairing Tips:

  • Green Goodness Smoothie: Kickstart your morning with a nutrient-packed green smoothie. Blend together spinach, banana, Greek yogurt, and a splash of almond milk for a refreshing and vitamin-rich companion to your Sausage Muffin.
  • Mixed Berry Salad: Balance the richness of the sausage and cheese with a vibrant mixed berry salad. Toss together strawberries, blueberries, and raspberries with a drizzle of balsamic vinaigrette for a sweet and tangy side.
  • Greek Yogurt Parfait: Keep it light with a Greek yogurt parfait. Layer Greek yogurt with fresh berries, granola, and a sprinkle of chia seeds for a protein-packed and satisfying accompaniment.

glass breakfast meal prep containers with english muffin with a sausage patty, topped with shredded cheese and orange slices.

round plate with english muffin with a sausage patty, topped with shredded cheese and orange slices.

Sausage and Cheese Muffin with Fruit

This Sausage and Cheese Muffin is an easy 5-minute recipe that is packed flavor and so easy to make and also freezer friendly!
No ratings yet
Prep Time 5 minutes
Cook Time 5 minutes
Course Breakfast
Cuisine American
Servings 2
Calories 350 kcal

Equipment

  • knife
  • cutting board

Ingredients
  

  • 2 english muffins
  • 2 chicken breakfast sausage patties 2.5 oz each
  • 2 tablespoons shredded cheese
  • 2 oranges sliced

Instructions
 

  • Pre-heat the toaster oven to 350F degrees.
  • Follow the packaged instructions to heat the chicken sausage.
  • Then, assemble the sausage muffin by layering the English muffin with the sausage patty and shredded cheese.
  • Place it on a sheet pan and let it warm up in the oven for about 2 to 3 minutes until the cheese melts and the muffin is toasted golden brown.

Notes

Nutrition information provided is an estimate. It will vary based on cooking method and specific ingredients used. Please consult with your healthcare provider for specific dietary needs. To gain a better understanding, explore our nutrition disclaimer here. 

Nutrition

Calories: 350kcalCarbohydrates: 42gProtein: 14gFat: 14gSaturated Fat: 5gPolyunsaturated Fat: 2gMonounsaturated Fat: 6gTrans Fat: 0.1gCholesterol: 37mgSodium: 588mgPotassium: 424mgFiber: 5gSugar: 12gVitamin A: 384IUVitamin C: 70mgCalcium: 129mgIron: 1mg

Similar Recipes

fried egg and sausage hash

Fried Egg with Apple and Sausage Hash

Easy Cheese Omelette

easy sausage egg muffins

Sausage Egg Muffins with Strawberries

You Might Also Like

Frequently Asked Questions

Can I use a regular oven instead of a toaster oven?

Absolutely! You can use a regular oven for this recipe. Preheat your oven to 350°F and follow the same instructions for assembling and baking. Keep an eye on the muffins to ensure they reach that perfect golden brown.


Can I add vegetables to the muffin for extra nutrition?

Absolutely! Customize your muffin with your favorite veggies. Sautéed spinach, sliced tomatoes, or avocado are great choices. Experiment with combinations that suit your taste and nutritional preferences.


How do I store leftovers?

If you have leftovers, store them in an airtight container in the refrigerator for up to 2-3 days. Reheat in the toaster oven or oven to maintain the texture and flavors.

Posted on Leave a comment

Oven Baked Harissa Chicken Tenders

Let’s make Oven Baked Harissa Chicken with Pomegranate! This chicken meal prep recipe is full of flavor, health, and simplicity. Picture succulent, oven baked chicken tenderloins and diced turnips coated in a vibrant harissa sauce, seasoned to perfection and baked to juicy perfection. What makes this dish a winner for busy individuals? It’s a combination of bold flavors that won’t break the bank, a nutritional powerhouse with lean protein and vibrant veggies, and a no-fuss, one-pan wonder that’ll have you savoring every bite without spending hours in the kitchen.

This post may contain affiliate links. Please see our privacy policy for details.

Calories: 327kcal | Carbohydrates: 16g | Protein: 38g | Fat: 12g | Saturated Fat: 2g | Polyunsaturated Fat: 2g | Monounsaturated Fat: 6g | Trans Fat: 0.02g | Cholesterol: 109mg | Sodium: 774mg | Potassium: 1016mg | Fiber: 4g | Sugar: 10g | Vitamin A: 329IU | Vitamin C: 45mg | Calcium: 53mg | Iron: 1mg

oven baked harissa chicken on a plate with veggies

What is Harissa?

Harissa is a versatile and flavorful condiment originating from North Africa. We love this condiment for meal prep because it’s known for its bold and spicy profile, making it a popular addition to various dishes. The primary ingredients in harissa include chili peppers, garlic, olive oil, and a blend of spices such as coriander, cumin, and caraway. 

Harissa is often used as a condiment to add heat and depth to dishes. It can be spread on bread, mixed into sauces, marinades, or dressings, and used as a flavor booster in soups, stews, and roasted dishes. It’s versatility is why we love using it for our oven baked chicken meal prep.

Why You’ll Love This Oven Baked Chicken Recipe

  • Quick and Easy Prep: Time is precious, and this recipe respects that. With minimal chopping and mixing, you’ll have a flavorful feast on the table without spending hours in the kitchen. It’s the perfect solution for those hectic days.
  • Healthy Goodness: Packed with lean protein from the chicken and nutrient-rich turnips, this dish is a nutritional powerhouse. Harissa sauce not only adds a kick but also brings metabolism-boosting capsaicin to the party. We’re talking about fueling your body with the good stuff!
  • Budget-Friendly Brilliance: We get it – budget matters. This recipe uses simple, accessible ingredients that won’t break the bank. Turnips are not only budget-friendly but also add a lovely earthy sweetness to the dish. You can enjoy a gourmet-style meal without a hefty price tag.
  • Flavor Fiesta: Harissa sauce brings a delightful North African flair, infusing the chicken and turnips with a spicy, smoky flavor. The paprika and garlic powder add depth, while the pomegranate seeds and pepperoncini peppers provide a burst of freshness and tang. It’s a symphony of tastes that’ll make your taste buds dance!
  • Convenient Sheet Pan Magic: Who loves doing dishes? Exactly. This recipe is a one-pan wonder. Toss everything on a sheet pan, pop it in the oven, and voila – minimal cleanup, maximum flavor. It’s a win-win for anyone who wants a delicious meal without the kitchen chaos.

The PrepYoSelf Newsletter

Ingredient Breakdown

  • Chicken Tenderloins: Lean Protein Powerhouse. Chicken is an excellent source of lean protein, essential for muscle maintenance and repair. It keeps you feeling full for longer, making it a fantastic choice for those looking to manage their weight.
  • Turnips: Fiber-Rich Satiety: Turnips bring in a substantial amount of dietary fiber. Fiber is the unsung hero when it comes to feeling satisfied after a meal – it slows down digestion, stabilizes blood sugar levels, and contributes to a lasting feeling of fullness.
  • Harissa Sauce: Metabolism Boost with Capsaicin: Harissa sauce, made from chili peppers, contains capsaicin. This compound not only adds a delightful heat but also boosts metabolism, aiding in weight management. Plus, the spiciness can help control appetite.
  • Pomegranate Seeds: Antioxidant Richness. Pomegranate seeds are bursting with antioxidants, particularly punicalagins and anthocyanins. These compounds have anti-inflammatory effects, support heart health, and contribute to overall well-being.
  • Pepperoncini Peppers: Vitamin C Kick. These peppers bring a tangy zing and a dose of vitamin C. Vitamin C is not only essential for a strong immune system but also aids in the absorption of non-heme iron from plant-based sources like turnips, enhancing overall nutrient utilization.
  • Paprika: Antioxidant Boost. Paprika, derived from bell peppers, adds flavor while contributing antioxidants like beta-carotene. Antioxidants play a crucial role in neutralizing free radicals, supporting cellular health and longevity.
  • Olive Oil: Healthy Fats for Satiety. Olive oil is a staple in the Mediterranean diet, known for its heart-healthy monounsaturated fats. These fats contribute to satiety, helping you stay full and satisfied after your meal.

oven baked chicken harissa on a plate

How to Meal Prep Harissa Chicken Tenders

  1. Preheat your oven to a toasty 425°F. We’re getting that crispy goodness started! Peel and dice those turnips into cute little 1/2 inch cubes. It’s like a veggie dance party in your kitchen!
  2. In a big mixing bowl, throw in your chicken tenderloins and those diced turnips. Now, let’s get saucy! Add in the harissa sauce, paprika, garlic powder, salt, and the star of the show – olive oil. Give it a good mix until everything is coated and ready to party.
  3. Lay out your chicken and turnip masterpiece on a sheet pan. It’s like a canvas of deliciousness. Pop it in the preheated oven and let the magic happen for 20-25 minutes or until the chicken hits that perfect 165°F internal temperature.
  4. Once your oven has worked its wonders, take out your creation and sprinkle it with pomegranate seeds and those zesty pepperoncini peppers. It’s the grand finale – flavor explosion!
  5. Now, serve it up and revel in the deliciousness you’ve just created. It’s a healthy, budget-friendly masterpiece that’s as easy as it is tasty.

Reference the recipe card below for detailed instructions.

oven baked harissa chicken on a plate

Pairing Tips for Harissa Chicken

  • Couscous or Quinoa: Serve the harissa chicken over a bed of fluffy couscous or nutty quinoa. These grains are excellent for soaking up the flavorful juices and adding a satisfying texture to each bite.
  • Greek Yogurt Sauce: Whip up a quick and refreshing Greek yogurt sauce with a dash of lemon juice, chopped mint, and a pinch of salt. This creamy sauce complements the spiciness of harissa and adds a cooling element to the meal.
  • Green Salad with Feta: Create a simple green salad with fresh greens, cucumber, and cherry tomatoes. Crumble some feta cheese over the top for a burst of creaminess and tang, balancing the heat from the harissa.
  • Herb-infused Rice: Elevate your meal with a side of herb-infused rice. Toss in some chopped parsley, dill, and a squeeze of lemon juice for a fragrant and flavorful accompaniment.
  • Garlic Hummus and Pita: Serve a side of garlic-infused hummus with warm, toasted pita bread. The creamy hummus adds richness, and the pita provides a satisfying element for scooping up the harissa chicken.
  • Tabbouleh Salad: Tabbouleh, a salad made with finely chopped parsley, tomatoes, and bulgur, is a fantastic side dish. It’s light, refreshing, and the citrusy notes will complement the harissa spice.
  • Citrusy Cucumber Salad: Combine sliced cucumbers with oranges, red onion, and a citrus vinaigrette. This salad adds a burst of freshness and a juicy, citrusy element to balance the meal.

harissa chicken

Oven Baked Harissa Chicken with Pomegranate

Indulge in the bold flavors of Oven Baked Harissa Chicken with Pomegranate, a one-pan wonder that's budget-friendly, packed with lean protein and vibrant veggies, making meal prep a breeze for busy individuals.
No ratings yet
Prep Time 5 minutes
Cook Time 25 minutes
Course lunch
Cuisine Middle Eastern
Servings 2
Calories 327 kcal

Equipment

  • knife
  • cutting board
  • mixing bowl
  • sheet pan
  • oven

Ingredients
  

  • 12 oz chicken tenderloins
  • 2 each turnips
  • 2 tbsp harissa sauce
  • 1/4 cup pomegranate seeds
  • 1/4 cup sliced pepperoncini peppers
  • 1/4 tsp paprika
  • 1/4 tsp garlic powder
  • 1/4 tsp salt
  • 1 tbsp olive oil

Instructions
 

  • Pre-heat the oven to 425F
  • Peel and dice the turnips into 1/2 inch cubes
  • In a mixing bowl add the chicken tenderloins and diced turnips
  • Add the harissa sauce, seasonings, and olive oil and mix it all together. Make sure the chicken and turnips are fully coated with the sauce and seasonings
  • Place the chicken and turnips on a sheet pan and bake in the oven for 20-25 minutes until the chicken reaches an internal temperature of 165F
  • Serve the chicken with pomegranate seeds and pepperonicini peppers

Notes

Nutrition information provided is an estimate. It will vary based on cooking method and specific ingredients used. Please consult with your healthcare provider for specific dietary needs. To gain a better understanding, explore our nutrition disclaimer here. 

Nutrition

Calories: 327kcalCarbohydrates: 16gProtein: 38gFat: 12gSaturated Fat: 2gPolyunsaturated Fat: 2gMonounsaturated Fat: 6gTrans Fat: 0.02gCholesterol: 109mgSodium: 774mgPotassium: 1016mgFiber: 4gSugar: 10gVitamin A: 329IUVitamin C: 45mgCalcium: 53mgIron: 1mg

Similar Recipes

orange chicken

Air Fryer Orange Soy Glazed Chicken and Broccoli

roasted chicken and rutabaga

Roasted Lemon Italian Chicken with Rutabaga

rosemary chicken

Rosemary Baked Chicken and Potatoes

You Might Also Like

Frequently Asked Questions

Can I use a different cut of chicken for this recipe?

Absolutely! While the recipe calls for chicken tenderloins, you can use other cuts like chicken breasts or thighs. Adjust the cooking time accordingly to ensure they reach a safe internal temperature.


I can’t find harissa sauce. Can I substitute it with something else?

While harissa has a unique flavor, you can try a mix of tomato paste, red pepper flakes, smoked paprika, and a touch of cayenne as a substitute. Adjust the quantities to your taste preference.


Is this recipe suitable for a low-carb diet?

Yes! The dish is relatively low in carbohydrates, especially if you pair it with cauliflower rice or a low-carb side.

Posted on Leave a comment

Lemon Ricotta Breakfast Cake

rectangle baking dish with a lemon ricotta breakfast cake

Energize Your Mornings with a Zesty Twist: Lemon Ricotta Breakfast Cake! This delightful creation not only tastes delicious but also takes the hassle out of your busy mornings. Picture this: a zesty, moist cake that’s not only a treat for your senses but a triumph for your meal prep game. With simple ingredients and a quick bake time, it’s the perfect solution for those who crave a wholesome breakfast but lack the time. Get ready to savor the joy of a well-prepared morning with this Lemon Ricotta Breakfast Cake that’s sure to become a staple in your breakfast routine.

This post may contain affiliate links. Please see our privacy policy for details.

Calories: 489kcal | Carbohydrates: 56g | Protein: 14g | Fat: 25g | Saturated Fat: 8g | Polyunsaturated Fat: 2g | Monounsaturated Fat: 13g | Trans Fat: 0.01g | Cholesterol: 113mg | Sodium: 139mg | Potassium: 204mg | Fiber: 2g | Sugar: 27g | Vitamin A: 407IU | Vitamin C: 29mg | Calcium: 189mg | Iron: 3mg

rectangle baking dish with a lemon ricotta breakfast cake

Why This Breakfast Cake is a Game-Changer for Meal Prep

In the world of breakfast delights, this cake stands out as a beacon of tastiness and convenience. So, whether you’re conquering the day solo or sharing the love with your loved ones, let the Lemon Ricotta Breakfast Cake be your morning delight.

  • Quick and Easy: In the blink of an eye, you’ll have a delightful breakfast ready to roll.
  • Zesty Goodness: The lemony kick will wake up your taste buds like a sunrise for your mouth.
  • Wholesome Ingredients: Indulge in the sweet satisfaction without the guilt. The use of olive oil and ricotta keeps it light and lovely
  • Portion Control: Slice it up into individual servings for built-in portion control. No need to eyeball your breakfast; it’s pre-portioned and ready to roll.

The PrepYoSelf Newsletter

Ingredients & Swaps

  • Egg: For an egg-free version, substitute with a flax egg (1 tablespoon ground flaxseed + 3 tablespoons water) or applesauce. This tweak maintains moisture while being kind to our vegan friends.
  • Sugar: Opt for natural sweeteners like maple syrup, honey, or coconut sugar instead of white sugar. It adds a subtle sweetness without the refined sugars. You can also use sugar alternatives such as swerve.
  • Oil: Choose a lighter oil, like avocado oil, for a dose of healthy monounsaturated fats. It keeps the cake moist while giving you a boost of heart-healthy goodness.
  • Flour: Sub in whole wheat flour for a fiber-rich alternative. This not only adds a nutty flavor but also keeps you feeling fuller for longer. Replace a portion of the flour with almond flour. This adds a delightful nuttiness to the cake.
  • Yogurt: Incorporate a couple of tablespoons of Greek yogurt for an additional protein boost and a creamy texture. It complements the ricotta beautifully.
  • Spices: Add a pinch of nutmeg to the mix for a warm, comforting flavor. Nutmeg complements the citrus notes and adds a layer of depth.

rectangle baking dish with a lemon ricotta breakfast cake

How to Meal Prep Lemon Ricotta Breakfast Cake

  1. Preheat your oven to 400°F.
  2. In a mixing bowl, gather your ingredients: 1 large egg, 1/4 cup white sugar, 1/2 cup ricotta cheese, 2 tablespoons of olive oil, and the freshly squeezed juice of one lemon. It’s time to let the flavor dance party begin! Mix until these ingredients well blended.
  3. Now, it’s time to add a little pow-wow to our mix. Sprinkle in 1/2 cup of flour and 1/4 teaspoon of baking powder. Keep the mixing vibes going until you’ve got a batter that’s smooth and sensational.
  4. Grease up your baking dish because it’s showtime! Pour your batter into the dish, making sure it’s spread out evenly. Pop it into the preheated oven and let the magic happen for the next 12-15 minutes.
  5. Keep an eye on your creation as it bakes. You want the center to be fully cooked, and when you insert a toothpick, it should come out clean. Once that happens, you’re officially the maestro of your kitchen!

Reference the recipe card below for detailed instructions.

rectangle baking dish with a lemon ricotta breakfast cake

Meal Prep Tips:

  • Transform the recipe into muffins for an even more portable option. Perfect for those days when you need breakfast on the run!
  • Serve your breakfast cake with a medley of fresh berries or sliced fruit. The natural sweetness pairs perfectly with the zesty cake.
  • A generous dollop of Greek yogurt on the side adds creaminess and a protein boost. It complements the cake’s texture and enhances the overall experience.
  • Sprinkle chopped nuts (like almonds or walnuts) or seeds (such as chia or flaxseeds) on top for an extra crunch and a dose of healthy fats.
  • Pair your slice with a cup of herbal tea, a latte, or a refreshing glass of orange juice. The choices are endless, and each adds its unique touch.
  • For a unique twist, pair the cake with a side of eggs or turkey sausage. The savory elements contrast beautifully with the sweet and citrusy flavors.

rectangle baking dish with a lemon ricotta breakfast cake

White rectangular baking dish with a lemon ricotta bar

Lemon Ricotta Breakfast Cake

Here's a light, refreshing Lemon Ricotta Breakfast Cake that is perfect for mornings made with simple ingredients. Perfect for a breakfast or mid-day snack or even as a dessert.
No ratings yet
Prep Time 5 minutes
Cook Time 15 minutes
Course Breakfast, Dessert, Snack
Cuisine American
Servings 2
Calories 489 kcal

Equipment

  • mixing bowl
  • baking dish
  • oven

Ingredients
  

  • 1 large egg
  • 1/4 cup white sugar
  • 1/2 cup ricotta cheese
  • 2 tablespoon olive oil
  • 1/2 cup flour
  • 1/4 teaspoon baking powder
  • 1 lemon (juiced)

Instructions
 

  • Preheat the oven to 400F. In a mixing bowl, combine the eggs, sugar, oil, lemon juice, and ricotta cheese. Mix until all ingredients have blended. Then, add the flour and baking powder and mix well.
  • Pour the batter into a greased baking dish and bake in the oven for 12-15 minutes until the center is fully cooked.

Notes

Nutrition information provided is an estimate. It will vary based on cooking method and specific ingredients used. Please consult with your healthcare provider for specific dietary needs. To gain a better understanding, explore our nutrition disclaimer here. 

Nutrition

Calories: 489kcalCarbohydrates: 56gProtein: 14gFat: 25gSaturated Fat: 8gPolyunsaturated Fat: 2gMonounsaturated Fat: 13gTrans Fat: 0.01gCholesterol: 113mgSodium: 139mgPotassium: 204mgFiber: 2gSugar: 27gVitamin A: 407IUVitamin C: 29mgCalcium: 189mgIron: 3mg

Similar Recipes

baked oatmeal

Oven Baked Oats with Apricots and Berries

ricotta apple

Oven Baked Apple with Ricotta and Walnuts

french toast 2

Oven Baked French Toast Muffins with Strawberries

You Might Also Like

Smartfruit Mellow Mango + Immunity, 100% Real Fruit Purée

Trader Joe’s Unsalted, Dry Toasted Slivered Almonds

Trader Joe’s the Dark Chocolate Lover’s Chocolate Bar

Frequently Asked Questions

Can I use low-fat ricotta cheese?

Yes, low-fat ricotta cheese can be used without compromising the texture or flavor of the cake. It’s a great option for those looking to reduce the fat content.


Can I use a different citrus fruit?

Absolutely! While the recipe calls for lemon juice, you can experiment with other citrus fruits like lime, orange, or even a combination for a unique twist on flavors.


Can I make this recipe gluten-free?

Yes, you can! Substitute the regular flour with a gluten-free flour blend or almond flour to create a gluten-free version of this breakfast cake. Adjust the quantity as needed based on the flour you choose.

Posted on Leave a comment

Cranberry Applesauce Muffin Bars

rectangular glass meal prep containers with cranberry applesauce muffin bars

These Cranberry Applesauce Muffin Bars are ready to take center stage in your breakfast meal prep lineup! These bars are not only a taste sensation but also a fantastic way to bring a burst of fall flavor to your busy week. These bars are a delightful combination of sweet and tart and they’re also a breeze to whip up and perfect for a week morning energy or on-the-go snacking. Prep them ahead, pack them up, and snack your way to happiness. Happy munching!

This post may contain affiliate links. Please see our privacy policy for details.

Calories: 232kcal | Carbohydrates: 43g | Protein: 6g | Fat: 5g | Saturated Fat: 1g | Polyunsaturated Fat: 1g | Monounsaturated Fat: 2g | Trans Fat: 0.01g | Cholesterol: 82mg | Sodium: 34mg | Potassium: 116mg | Fiber: 2g | Sugar: 16g | Vitamin A: 136IU | Vitamin C: 1mg | Calcium: 21mg | Iron: 2mg

round white plate with cranberry applesauce muffin bars

Why You’ll Enjoy These Muffin Bars

In the midst of holiday chaos and workweek madness, these Cranberry Applesauce Muffin Bars are here to simplify your life. They bring ease, flavor, and a touch of festive joy to your daily routine. So, go ahead, treat yourself to a stress-free morning, and let the deliciousness of these bars make your days a little brighter! 

So, let’s dive into the top 5 reasons why these Cranberry Applesauce Muffin Bars are a game-changer for busy individuals during hectic work weeks, especially in the festive holiday season!

  • Quick and Effortless Prep: Life moves fast, and these muffin bars keep up! With minimal ingredients and a straightforward process, you can have a batch ready to roll in no time. Perfect for those busy mornings when every second counts.
  • Versatile Ingredients for Stress-Free Shopping: The ingredient list is short and sweet, and chances are you already have most of these staples in your kitchen. No need for a lengthy shopping trip or searching for obscure items. Keep it simple, keep it tasty!
  • Portable Deliciousness: The hustle and bustle of the holiday season demand snacks that can keep up. These bars are not only delicious but also portable, making them the ideal companion for your on-the-go lifestyle. Grab one on your way out the door, and you’re set!
  • Holiday Flavors in Every Bite: The festive combo of cranberries and applesauce brings a taste of the holidays to your daily routine. It’s like a little celebration in every bite, uplifting your mood and giving you that extra boost to power through the busiest of days.
  • Make-Ahead Magic: Meal prep enthusiasts, rejoice! These muffin bars are the definition of make-ahead magic. Whip up a batch during your Sunday meal prep session, and you’ll have a week’s worth of scrumptious breakfasts or snacks at your fingertips. Less stress, more yum!

The PrepYoSelf Newsletter

Ingredients You’ll Need

  • Large Egg: The egg plays a crucial role in binding our muffin bars together, giving them that perfect texture. It adds richness and contributes to the overall moistness of the bars. Plus, eggs are a fantastic source of high-quality protein, making these bars a wholesome choice to kickstart your day.
  • Applesauce: Ah, the unsung hero of healthier baking! Applesauce not only imparts a natural sweetness to our bars but also replaces some of the fat, keeping them moist without sacrificing flavor. It brings a hint of apple goodness to every bite, adding a touch of fruity freshness.
  • Flour (Gluten-free if preferred): The backbone of our recipe, flour gives structure to the muffin bars. Whether you opt for traditional or gluten-free, it’s the canvas on which the other flavors dance. A simple yet essential ingredient, ensuring our bars have that satisfying, cake-like texture.
  • Dried Cranberries: These little bursts of tartness are like jewels in our muffin bars. Dried cranberries add a pop of color, a hint of sweetness, and a delightful chewiness. Packed with antioxidants and flavor, they elevate the bars to a whole new level, making each bite a delightful surprise.
  • Olive Oil: A touch of good-for-you fat! Olive oil adds a subtle richness to the bars while contributing to their moistness. It also brings its unique flavor profile, complementing the sweetness of the applesauce and the tartness of the cranberries. A healthier alternative that doesn’t compromise on taste.

rectangular glass meal prep containers with cranberry applesauce muffin bars

How to Meal Prep Cranberry Applesauce Muffin Bars

  1. Preheat your oven to 350°F (175°C).
  2. Grab a mixing bowl and let the whisking party begin! Crack open that egg, add in the applesauce, and sprinkle in the sugar. Give it a good whisk until everything is harmoniously blended.
  3. Time to add the flour to our mix. Pour it in, toss in those vibrant dried cranberries, and let the magic happen as you stir everything together. Watch the batter come to life!
  4. A little olive oil love for our baking dish – make sure it’s coated to prevent any muffin bar from sticking. Now, pour in that luscious batter. Can you smell the deliciousness already?
  5. Pop that baking dish into the preheated oven and let the baking magic unfold. In just 15-20 minutes, you’ll have golden-brown, heavenly bars. Keep an eye on them and let your kitchen fill with that irresistible aroma.
  6. Once the center is fully cooked and your kitchen is filled with the irresistible scent of cranberry applesauce bliss, take the bars out and let them cool. When they’re comfortably warm, cut them into squares or bars – whatever your heart desires!

Reference the recipe card below for detailed instructions.

round white plate with cranberry applesauce muffin bars

MealPrep Tips:

  • Double or Triple the Recipe: If you have the oven fired up, why not make a larger batch? Doubling or tripling the recipe allows you to prepare a surplus of muffin bars that can be stored for the entire week. This way, you’ll have a ready-made breakfast or snack whenever hunger strikes.
  • Freeze for Future Convenience: Muffin bars freeze remarkably well. Wrap individual bars in plastic wrap or place them in a freezer-friendly container, and you’ll have a stockpile of convenient, ready-to-eat snacks. Just pop them in the microwave or let them thaw in the fridge overnight when you’re ready to enjoy.
  • Mix Up the Flavors: While the cranberry applesauce combo is delightful, don’t be afraid to experiment with other mix-ins. Try adding nuts, seeds, or different dried fruits to customize the bars to your liking. This way, you can enjoy a variety of flavors throughout the week.
  • Pair with Complementary Snacks: Enhance your meal prep game by pairing these muffin bars with complementary snacks. Consider adding a dollop of Greek yogurt, a handful of fresh berries, or a piece of cheese for a well-rounded and satisfying meal.

rectangular glass meal prep containers with cranberry applesauce muffin bars

round white plate with cranberry applesauce muffin bars

Cranberry Applesauce Muffin Bars

Whip up a batch of delightful Cranberry Applesauce Muffin Bars – a quick, versatile, and make-ahead treat that combines the seasonal flavors of cranberries and applesauce for a perfect on-the-go breakfast or snack during your busiest days!
No ratings yet
Prep Time 5 minutes
Cook Time 20 minutes
Course Breakfast, Snack
Cuisine American
Servings 2
Calories 232 kcal

Equipment

  • mixing bowl
  • whisk
  • baking dish
  • oven

Ingredients
  

  • 1 large egg
  • 1/2 cup applesauce
  • 1/2 cup flour
  • 1 oz dried cranberries
  • 1 teaspoon olive oil

Instructions
 

  • Pre-heat the oven to 400F. In a mixing bowl whisk together the eggs, sugar, and applesauce.
  • Next, add the flour, cranberries, and mix it well. Grease a baking dish with oil and pour in the batter.
  • Bake in the oven for 15-20 minutes until the center is fully cooked.

Notes

Nutrition information provided is an estimate. It will vary based on cooking method and specific ingredients used. Please consult with your healthcare provider for specific dietary needs. To gain a better understanding, explore our nutrition disclaimer here. 

Nutrition

Calories: 232kcalCarbohydrates: 43gProtein: 6gFat: 5gSaturated Fat: 1gPolyunsaturated Fat: 1gMonounsaturated Fat: 2gTrans Fat: 0.01gCholesterol: 82mgSodium: 34mgPotassium: 116mgFiber: 2gSugar: 16gVitamin A: 136IUVitamin C: 1mgCalcium: 21mgIron: 2mg

Similar Recipes

baked oatmeal

Oven Baked Oats with Apricots and Berries

ricotta apple

Oven Baked Apple with Ricotta and Walnuts

french toast 2

Oven Baked French Toast Muffins with Strawberries

You Might Also Like

Smartfruit Mellow Mango + Immunity, 100% Real Fruit Purée

Trader Joe’s Unsalted, Dry Toasted Slivered Almonds

Trader Joe’s the Dark Chocolate Lover’s Chocolate Bar

Frequently Asked Questions

Can I use fresh cranberries instead of dried?

Yes, you can use fresh cranberries, but keep in mind that the texture and sweetness may differ. Adjust sugar levels accordingly.


Can I add spices like cinnamon or nutmeg?

Absolutely! Enhance the flavor profile by adding a pinch of cinnamon, nutmeg, or your favorite spices.


Can I use a different fruit besides applesauce?

Experiment with mashed bananas, pumpkin puree, or pear sauce for a unique flavor twist.

Posted on Leave a comment

Breakfast Bacon Egg Cups

round glass meal prep containers with bacon wrapped eggs and roasted tomato

Here’s a breakfast recipe that’s not only delicious but also ridiculously easy to whip up – Bacon Egg Cups with Roasted Tomato. These little cups of joy are the perfect way to start your day with a protein-packed punch and a burst of flavor. Let’s dive into the kitchen and get these eggs baking!

This post may contain affiliate links. Please see our privacy policy for details.

Calories: 333kcal | Carbohydrates: 2g | Protein: 17g | Fat: 28g | Saturated Fat: 9g | Polyunsaturated Fat: 5g | Monounsaturated Fat: 12g | Trans Fat: 0.1g | Cholesterol: 356mg | Sodium: 418mg | Potassium: 285mg | Fiber: 0.4g | Sugar: 1g | Vitamin A: 760IU | Vitamin C: 4mg | Calcium: 55mg | Iron: 2mg

round plate with bacon wrapped eggs and roasted tomato

The PrepYoSelf Newsletter

Here’s why you need to make this:

These Bacon Egg Cups with Roasted Tomato are not just a tasty treat but also a healthy indulgence that is perfect for meal prep, especially for busy individuals aiming to stay on track with their nutrition:

  • Excitement in Every Bite: Sticking to a meal plan can sometimes feel monotonous, but not with these bacon egg cups. The variety of textures – the crispy bacon, creamy eggs, and juicy tomatoes – along with the interplay of sweet and savory flavors, ensures that each bite is exciting. Meal prep shouldn’t be a chore; it should be an anticipation of delicious moments, and these cups deliver just that.
  • Flavor Harmony: The flavor combinations in these cups create a delightful symphony for your taste buds. The savory, smoky notes from the bacon perfectly complement the richness of the eggs. The roasted tomatoes add a burst of sweetness and acidity, balancing the dish. Topped with fresh green onions, you get a pop of brightness and a hint of freshness that ties everything together into a harmonious and satisfying flavor experience.
  • Portion Control and Satiety: Meal prepping these cups allows for easy portion control. Each cup is a perfectly sized, balanced serving, helping you manage your calorie intake.
  • Time-Efficient Meal Prep: For busy individuals, time is of the essence. These bacon egg cups are a brilliant solution. With just a few simple ingredients and minimal prep time, you can have a batch ready to go. Pop them in the oven, and while they bake, you can focus on other tasks, making it a time-efficient and hassle-free meal prep option.

Simple Ingredients You’ll Need

  • Eggs: We used whole eggs, but you can also swap this with egg whites. 
  • Bacon: Who can resist the allure of bacon? Those savory, crispy slices not only wrap our eggs like a cozy blanket but also infuse every bite with a smoky, salty goodness. Bacon adds that irresistible crunch and umami flavor that takes these cups to the next level. You can swap it with turkey bacon or even prosciutto.
  • Roma Tomato: Enter the burst of freshness! The roma tomato brings a juicy, sweet element to the dish. Roasting them intensifies their natural flavors, creating a delightful contrast to the savory bacon and creamy eggs. It’s the touch of brightness that makes each bite a flavor symphony.
  • Olive Oil: Olive oil plays a crucial role in roasting our tomatoes, adding a subtle earthiness and enhancing their natural sweetness. It also helps achieve that perfect golden crispiness in both the bacon and the edges of the eggs.
  • Green Onions: The vibrant finish! Chopped green onions are not just a garnish; they’re the final touch that brings a burst of freshness and a mild oniony kick. Their bright green color adds visual appeal, and their crisp texture provides a satisfying contrast to the softer components of the dish.

round glass meal prep containers with bacon wrapped eggs and roasted tomato

How to Meal Prep Bacon Egg Cups

  1. First things first, let’s get that oven preheated to a toasty 400°F (or approximately 200°C). This ensures that our bacon egg cups and roasted tomatoes get that perfect golden crispiness.
  2. Now, grab your muffin tin and let’s give these eggs a cozy bacon blanket. Take each bacon slice and wrap it in a circle inside the muffin tin cups. This not only adds a savory touch but also forms the perfect vessel for our eggs.
  3. Time to introduce the stars of the show – crack one large egg into each bacon-wrapped cup. Sprinkle a pinch of salt on top for that extra flavor kick.
  4. Let’s not forget about our roasted tomato companions! Cut that roma tomato in half and place each half in a muffin tin cup. Drizzle them with a teaspoon of olive oil and sprinkle a bit of salt to taste. These roasted tomatoes add a burst of juicy sweetness that pairs perfectly with the savory bacon and eggs.
  5. Pop your muffin tin into the preheated oven and let the magic happen. Bake for approximately 15 minutes or until the egg whites are set. You’ll know they’re ready when the bacon is crispy, and the eggs are cooked to your liking.
  6. Once the bacon egg cups and tomatoes are out of the oven, use a knife to gently loosen the edges of each cup.
  7. Now, let’s add a pop of color and freshness – sprinkle those bacon egg cups with a generous amount of chopped green onions. Not only do they look Instagram-worthy, but they also add a delightful crunch and a burst of oniony goodness.

Reference the recipe card below for detailed instructions.

round plate with bacon wrapped eggs and roasted tomato

Meal Prep Pairing Tips:

These bacon egg cups are not just limited to breakfast. They make a fantastic addition to brunch, lunch, or even a light dinner. Pair them with quinoa, couscous, or a simple green salad for a more substantial meal.

  • Fresh Greens: Serve these cups with a side of fresh greens or a simple salad to add a crunchy and refreshing element to your meal.
  • Avocado Slices: Creamy avocado slices are a perfect accompaniment. The richness of avocado complements the bacon and eggs beautifully.
  • Whole Grain Toast: Enjoy these cups with a side of whole grain toast for a satisfying crunch and additional fiber. It’s a great way to make the meal more filling.
  • Greek Yogurt with Berries: Balance the savory goodness with a sweet touch. A bowl of Greek yogurt topped with fresh berries adds a delightful contrast.
  • Salsa or Hot Sauce: Spice things up! A dollop of salsa or a dash of hot sauce can add a kick of flavor that enhances the overall experience.

round glass meal prep containers with bacon wrapped eggs and roasted tomato

round plate with bacon wrapped eggs and roasted tomato

Bacon Egg Cups with Roasted Tomato

Enjoy the savory symphony of flavor with these Bacon Egg Cups featuring crispy bacon, creamy eggs, and sweet roasted tomatoes, creating a delightful and nutritious meal prep option for any time of day!
No ratings yet
Prep Time 5 minutes
Cook Time 11 minutes
Course Breakfast
Cuisine American
Servings 2
Calories 333 kcal

Equipment

  • knife
  • cutting board
  • muffin
  • oven

Ingredients
  

  • 4 large eggs
  • 4 bacon slices
  • 1 roma tomato
  • 1 teaspoon olive oil
  • 1 teaspoon green onions (chopped)
  • salt (to taste)

Instructions
 

  • Pre-heat the oven to 400F. Place the bacon slices in the muffin tin by wrapping it in a circle. Crack an egg into each cup and sprinkle with salt.
  • Cut tomato in half and place each half in a muffin tin. Drizzle the tomatoes with olive oil and sprinkle with salt to taste.
  • Bake the bacon egg cups and tomatoes in the oven for 15 minutes until the egg whites set. Use a knife to loosen the edge of each cup. Garnish with chopped green onions

Notes

Nutrition information provided is an estimate. It will vary based on cooking method and specific ingredients used. Please consult with your healthcare provider for specific dietary needs. To gain a better understanding, explore our nutrition disclaimer here. 

Nutrition

Calories: 333kcalCarbohydrates: 2gProtein: 17gFat: 28gSaturated Fat: 9gPolyunsaturated Fat: 5gMonounsaturated Fat: 12gTrans Fat: 0.1gCholesterol: 356mgSodium: 418mgPotassium: 285mgFiber: 0.4gSugar: 1gVitamin A: 760IUVitamin C: 4mgCalcium: 55mgIron: 2mg

Similar Recipes

fried egg and sausage hash

Fried Egg with Apple and Sausage Hash

Easy Cheese Omelette

easy sausage egg muffins

Sausage Egg Muffins with Strawberries

You Might Also Like

Frequently Asked Questions

Can I add cheese to these egg cups?

Definitely! Feel free to sprinkle some shredded cheese on top of the eggs before baking. Cheddar, feta, or mozzarella would all be delicious choices.


What other vegetables can I add to these bacon egg cups?

Get creative! Spinach, bell peppers, mushrooms, or even diced zucchini would be fantastic additions. Just make sure to adjust the cooking time if adding more veggies.


Can I use a different type of tomato?

While Roma tomatoes work well, you can experiment with cherry tomatoes or grape tomatoes for a sweeter twist. Just adjust the baking time accordingly.